Thousand Mile Boots

Exploring The World One Mile At A Time

How To Be A Responsible Traveler

It’s a new year which means we all take on new resolutions and changes. One resolution I hear a lot of lately is, “I’m going to travel more.” And while…

It’s a new year which means we all take on new resolutions and changes. One resolution I hear a lot of lately is, “I’m going to travel more.” And while that thrills me to hear, it also reminds me that we all need to be responsible while traveling, especially to places that see A LOT of tourists. 

More and more people are traveling and that means several negative things: more trash, more carbon in the air, more people acting like they’re on spring break in Miami.

To combat those negatives, there’s a huge movement among millennial travelers to be much more eco- and local-conscious.

So, how can we, as travelers, be more responsible and leave the world better than how we found it? It’s a lot easier than you might think.

How To Be A Responsible Traveler


Attention: My post may contain Amazon affiliate links! As an Amazon Associate I earn from qualifying purchases.


Volunteer with Locals

Volunteer with Locals or Try a Volunteer Vacation

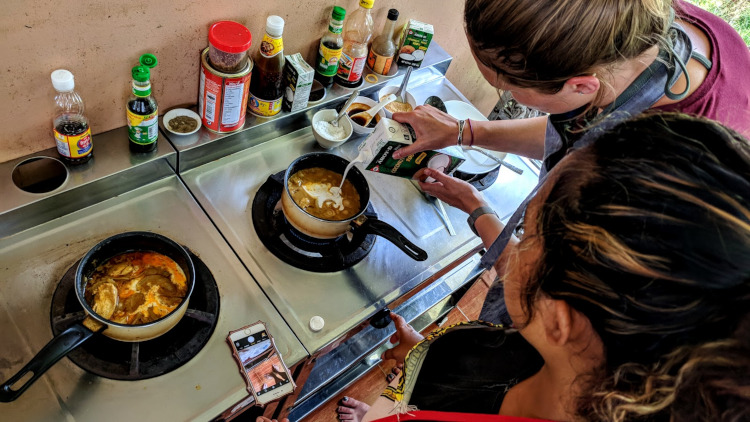
When heading out onto your vacation, why not see how you can help the locals? Perhaps there’s a soup kitchen in Berlin that could use an extra hand or a village outside of Hanoi that may need help weeding an area for crops.

Whatever your skill level or strength, there’s bound to be a local organization that could use an extra volunteer for a day or two.

What an amazing way to add some meaningful purpose to your trip! You’ll even get to hang out with locals and learn more of their way of life.

Plus, they would be extremely appreciative and you’d be doing some good for the world.

Did you know that you can do volunteer work as a vacation? It’s true!

These trips are usually a week long and provide basic accommodations and even meals! Plus the cost is usually cheaper than a traditional vacation.

Each trip is different but volunteer activities can range from teaching English to building homes, schools, playgrounds and gardens. They also offer you the opportunity to get immersed in the culture with free time or scheduled group trips to local areas and cities.

Heading out on ‘volunteer vacations’ is slowly becoming more popular, especially among the millennial generation, but these trips are great for solo travelers, students and families.

International Volunteer HQ and Plan My Gap Year are the two most popular sites for finding international volunteer trips.

Be aware, however, that these trips do not include airfare – you’ll need to do that on your own.
 

Smaller Cities and Villages

Check Out Smaller Cities and Villages

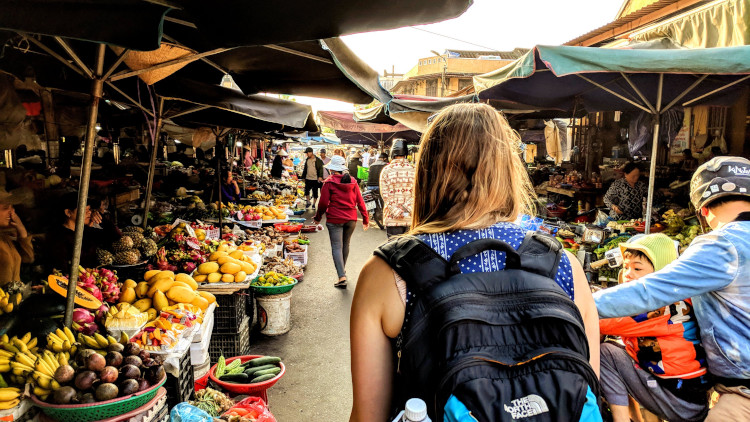
There’s something to be said about visiting major cities like New York, Paris, London, Tokyo or Beijing but you’d be missing out on a lot if you overlook cities like Normandy, France, Havana, Cuba and Nara, Japan.

Smaller, lesser known cities boast big opportunities for responsible travelers to learn more about the region and the nation’s people.

You’d also run into less crowds, find inexpensive restaurants & accommodations and get to spend more time with the locals.

Plus, spending your money in these towns goes a long way into securing their businesses and their futures.

Related: The Most Important To-Do List for Your International Flight
Andy Morocco Jan 2016

Take the Time to Learn the Language – Or Just a Few Phrases

Other than English, I can speak in 5 different languages. Well…I know some words or phrases in 5 different languages.

But that’s all it takes to go from a tourist to responsible traveler in any country!

I find that when I say ‘hello, please, thank you’ in the local language, most people light up with a smile. It’s the easiest way to make friends and break the ice when meeting someone new.

Even if you think you’re butchering the language, as long as you’re trying, that’s really all that matters.

Learning a few, important phrase might also help you when you’re lost, trying to make a purchase or ordering food.

My favorite way to learn a new language is through the Duolingo App which can be downloaded on all smartphones.

Not only is Duolingo free to use (there is also a paid version), it offers over 20+ languages and continues to add more all the time!

You can even learn Klingon and no, I’m not kidding.

Spending a few minutes a day with a language app like this, learning just simple phrases, will go a long way at creating a more meaningful trip.


Adhere to Local Custom Morocco

Adhere to Local Customs and Culture

When going to a country that is particularly different from yours, where they have a totally different way of life, do your best to learn a few of their customs. This will go a long way of getting locals to become comfortable around you.

Remember: You are in their country, not yours, so don’t take offense to customs or beliefs that you may not understand or agree with.

As a responsible traveler, you’ll want to keep an open mind and follow the locals. It’s as much about respect as it is a learning experience.

Learning the country’s customs will also help you have an easier, stress free trip.

For example, in Paris I learned that I could not get dinner any time before 7:00 pm so I adjusted my schedule to accommodate when the restaurants would open for dinner.

I also learned that most waiters will not come up to your table to check on you or see if you need anything, you have to wave them over. In America this would seem impolite, in France, it’s normal!

So how do you research a country’s social customs? Well, the internet becomes your best friend.

You can do a general search but you’ll get thousands of results and some of the information can be conflicting. I’d suggest checking to see if the country has a local tourism website or embassy.

If traveling with a tour group, check with the company. Many will do the research ahead of time for you and will answer questions you didn’t even know you had.

You can also check out travel forums and see if someone else has posted anything, if not, you can ask! You’ll most likely receive a ton of answers and even suggestions on local places to check out. Win-win information!

Related: Long Haul Flight: Survival List

Minimize Your Carbon Footprint Wherever Possible

Responsible travelers understand that flights are not the most eco-friendly way to travel and do their best to minimize emissions where possible.

There are so many ways to do this while traveling both in the sky and on foot. Doing so is not only good for the environment but also on your conscious and sometimes your wallet.

Rather than country hopping, check out a destination where you can get a round-trip flight and then explore that city as well as the surrounding area.

Not only will you be lowering emissions by not flying to multiple countries, you’ll get more time to explore deeper into that country’s culture and people.

If you will be country hopping, look for more travel friendly transportation like local buses or trains.

While in Vietnam, I took overnight trains to several cities and it was an incredible way to see how the locals traveled and get to see some countryside I wouldn’t have gotten to see had I flew.

Plus it’s an experience that will stay with me for a lifetime!

If you do have to fly to several countries – let’s be honest, it happens – responsible travelers look for offset programs like United Airlines and Delta Airlines to help reduce their carbon footprint. You can also search through retail certification programs like Green-G Climate which provides a large list of verified carbon offset retailers.

Lastly, always book coach.

I know, it’s not as glamorous as economy or first class, and you may get stuck next to someone who snores but you’ll be doing your part in helping to reduce emissions.

Think of coach as carpooling. The more people you can squeeze on the plane, the less planes are in the air and the more cost effective the flight becomes.

Don’t believe me?

Check out this in-depth study World Bank conducted on flights and carbon emission. While the math goes over my head the bottom line is flying in economy or first class creates almost 10x times the carbon emissions as flying in coach.

This study was conducted back in 2013… imagine how much worse it’s gotten since then. That information alone is enough to make me forever fly in coach.
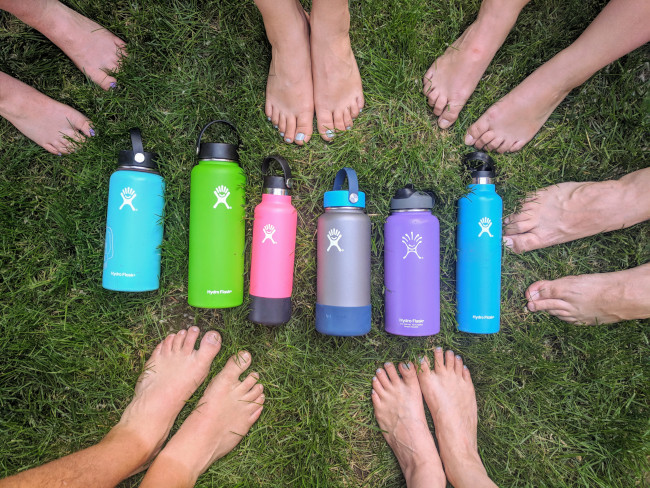
 

Reusable Water Bottles

Go Green! Carry a Reusable Water Bottle

Annually, between 300-500 billion plastic bottles are used and tossed, globally. Of that number, 50 billion comes from the United States alone! And studies show that those numbers are set to increase over the next decade.

People…that’s a million bottles a minute! Let that sink in for a moment.

The situation is worse in developing countries who don’t have safe drinking water – bottled water is the only way to hydrate.

By the way, water bottles are made of polyethylene terephthalate (Pet) which can take over 400 years to break down. Not to mention, micro-plastics from bottles and trash are getting into the oceans and contaminating sea life….which we eat.

Seriously, this stuff is nasty!

So how does a responsible traveler deal with this crisis? By bringing their own reusable water bottle.

Really, this is probably the easiest and cheapest thing for you to do. Do you really want to buy water every time you’re thirsty? It’s not gentle on the wallet, depending on where you are.

Most domestic airports have water fountains and, if you don’t trust those, many have water bottle fill-up stations. Even international airports are hopping on the bandwagon by providing travelers with clean, drinking fountains.

And while you may not water fill-up stations in smaller airports or in developing countries, buying a gallon of water and refilling your reusable bottle saves hundreds of bottles yearly.

You can even ask a restaurant or your hotel to fill it for free.

While I was in Vietnam and Thailand, every hotel lobby had a large container of clean water available for guests. Refilling my bottle was SO easy.

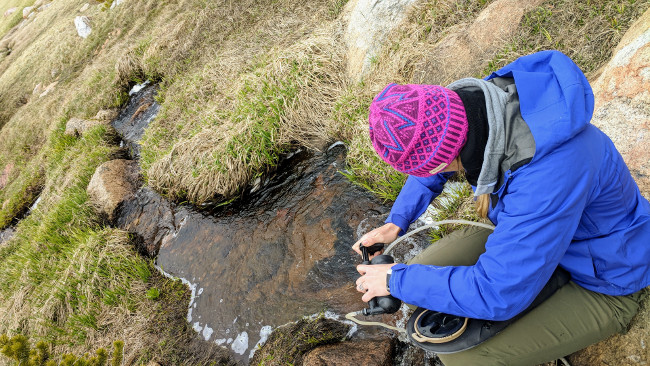
And if you’re really worried, you can always look for water bottles that come with filter inserts like the LifeStraw Go Water Filter Bottle. This particular one comes with a 2-stage integrated filter straw but there are similar products out there as well.

Bottom line, carrying a reusable bottle is not only better on your wallet, it’s better for the environment.


gary-chan

Leave No Trace

This one is huge to me since I’m not just an travel-lover but also an avid nature lover. And since I backpack and camp, pretty much monthly, Leave No Trace comes up a lot.

Leave No Trace is a national U.S. organization that works to educate the public on how to protect nature by protecting it and enjoying it responsibly.

It’s a pretty easy concept to grasp. Basically, what you pack in, you pack out, using the appropriate recycling methods to help rid nature of human trash and waste.

And while the Leave No Trace organization is primarily focused on the U.S., there’s no reason this concept can’t be taken across oceans to other countries.

Related: How to Ease Stress & Anxiety While Traveling
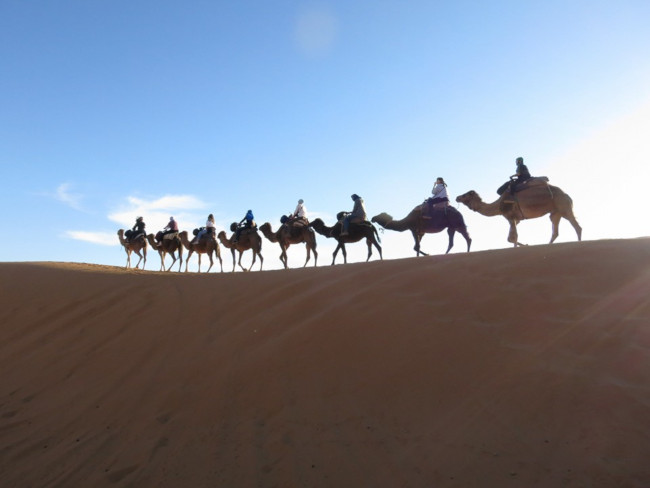
Camel Ride Morocco Jan 2016

Thoroughly Research Wildlife Activities

So you traveled all the way to Thailand and you’ve been dying to get that envious photo of you riding an elephant. Here’s my advice for you: DON’T. DO IT!

There are thousands of local businesses touting the opportunity for you to get up close and personal with a variety of wildlife. And while that may sound like an incredible opportunity, think again.

Many of the animals are held in captivity, captured or sold illegally, and may be forced, by starvation and beatings, to carry people around or perform stunts.

It’s absolutely horrific what happens to these animals.

Take elephant riding for example: baby elephants are ripped away from their mothers, forced into confinement where are starved and beaten. During this time, wranglers will wrestle with the animal until its forced into submission, crushing out the animal’s spirit to survive.

And it’s not just elephants. This kind of treatment happens to monkeys, tigers, leopards, dolphins, the list goes on.

These kind of industries thrive on tourism and ignorance. Be a responsible traveler and learn how local animals are treated.

Better yet! Volunteer at animal preserves or sanctuaries like the Chiang Mai Elephant Nature Park where you’ll learn more about how the animals are rescued and what’s being done to squash elephant riding.

You’ll also get to see the elephants up close, helping to wash, feed and care for them.
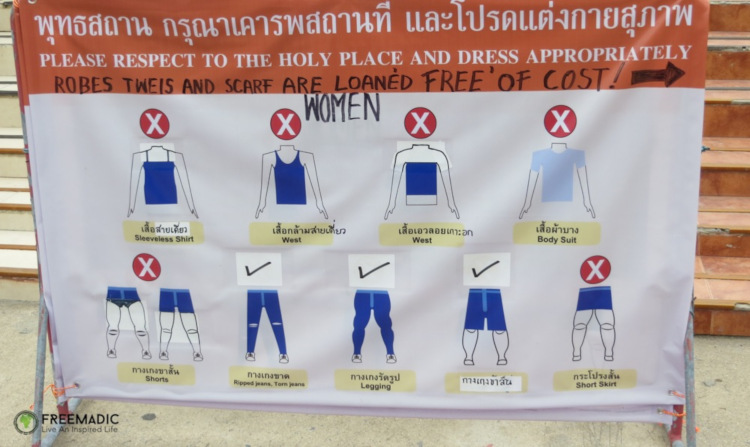
 

Photo by Freemadic

Dress Respectively

I’m not trying to give you fashion advice here, nor am I’m trying to squash whatever belief you have. That being said, I do believe in respecting the local culture by wearing what’s deemed appropriate for the area.

First world countries like the U.S., France, Italy, the U.K., are relatively fine with whatever you want to wear, be it short-shorts, tank-tips, sandals or hats. Other places, like Egypt, Morocco, Vietnam and more tend to follow a more conservative dress code.

I step lightly here as I’m from America where we have varying opinions about clothing and what certain types of dress represent.

Most countries are forgiving to tourist who do not adhere to the local ‘dress code’ but understand that you might not be allowed in certain buildings or areas unless properly dressed.

Take the Buddhist temples in Vietnam – they have signs by entryways advising visitors of what constitutes as proper, respectful wear. For example, men and women couldn’t wear shorts or shirts that exposed the shoulders. You were also asked to remove hats and shoes.

When I was in Morocco the women in my group weren’t required to wear a dress while inside a mosque though many of us did. We did this out of respect for the local customs.

Responsible travelers understand that their freedoms are not being squash; they’re showing respect.

Don’t know what is deemed appropriate for the area you’re heading to? A quick Google search can definitely help.

In my opinion, find comfortable basics. Wear shirts that cover your shoulders, have shorts, long pants, skirts on hand and opt for comfortable, closed toe shoes.

From there, let your creative and personality come through!

Related: Long Haul Flight: Survival List
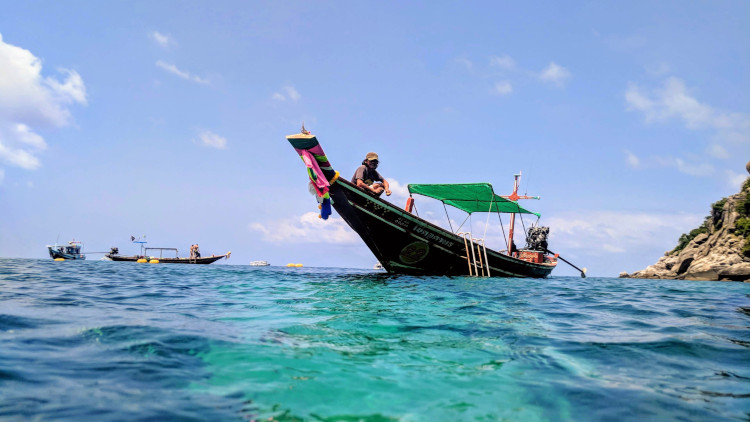
Taking Photos of Locals

Ask Before Taking Someone’s Photo

In any country, even your own, you should always ask permission to take a photo of someone.

Of course we all want those incredible, candid shots of everyday life in remote parts of the world but in some cultures, this is a big no-no.

I’m not talking about photos where people are indirectly shown, I’m referring to when you want that person to be the focal point of the image.

As a responsible traveler always asks before taking the photo. If you’ve already snapped away, perhaps show the subject the photo and ask if it’s okay to keep.

In most cases you’ll be fine, although they may ask for you to provide them with a copy via email or ask for a little money (in the case of performers/vendors). However, there may be times when you’re asked to delete it. If this happens, you should respect their wishes and delete the photo – show them that you’ve deleted it.

This isn’t just the case for people but for religious artifacts, religious sites or of items of sensitive nature.

For example, The Louvre in Paris, France – there are areas where you are not allowed to take photos and places you are. This all depends on the artwork and the exhibit.

Places like this, especially sites that are targeted towards tourism, usually provide photography information and restrictions, however, when in doubt, ask if photos are okay.

If you’re told ‘no’, respect that and just commit the experience to memory.

In severe cases, you might have your camera or phone confiscated and/or destroyed. Like I said, those are severe cases and are most likely to happen at military sites and check points in conflicted nations.

If that happens, do not fight them on it. Just hand over the phone or camera and accept the consequences. It’s not worth getting into trouble or risking your life.


Don’t Give Food or Money to Beggars or Children

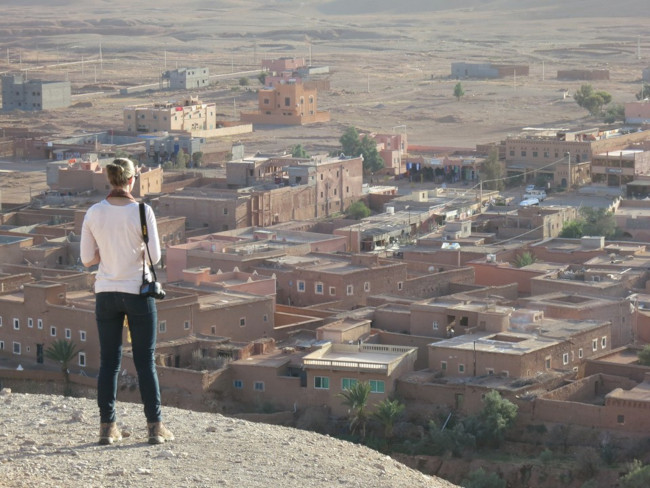
This was something that kicked me in the gut the first time I went to a foreign country. When I visited Morocco in 2016, it was my first real trip outside of the U.S.

After making introductions and pleasantries with my tour group, our guide went over basic rules including not giving money or food to begging children and adults. Honestly, I was shocked!

Why wouldn’t you want us to help them out? I can’t let a child starve! I had thought at the time.

Our guide explained that by allowing them to beg, you’re encouraging them to continue with this cycle of poverty. By taking away the ‘crutch’ of free food or money, they’d be force to seek help from local organizations that will provide for them. These organizations also teach them useful skills they’d need to find work and provide for themselves.

As much as it pained me, it made sense.

It also became blatant how dangerous begging could be, especially for a child, when Alex and I were in Morocco and we’d see children with their hands cupped for money or candy, all the while an adult would be standing nearby, watching.

Yes…some adults will use children to pull on the heartstrings of unsuspecting tourist.

They’ll use children to obtain money, rob them and use them to lure tourists into back alleyways and shops where they take everything you have.

By giving into the begging, we allow the cycle to continue.

So, what should you do in a situation where a child comes begging for coin or candy? As hard as it is, you need to ignore them.

In some cases, our guide would take the children aside and remind that begging is wrong and advise them on where they could go for a meal.

Usually, the kids just huffed and stalked off but a few headed in the direction he gave them.

If you do want to help these kids out, you still can! By donating to responsible, non-governmental organizations like Save the Children you can make a difference, even if you don’t see the direct impact.


helping anxiety stress

Educate Others and Spread the Word of Responsible Travel

So you’re home now, you’ve thrown your luggage into the closet and uploaded all your amazing photos to social media. The trip is officially over.

Or is it?

Your trip doesn’t have to end when you get home. Why not tell others about your experience? Perhaps someone else could benefit from what you’ve learned. You may even know a person or two who would be interested to learn more about responsible travel.

So spread the word! Share your responsible travel experience with family, friends and strangers.

By taking a proactive step in informing others about travel you make it easier to obtain, more exciting and add a sense of meaning.

Traveling doesn’t just happen when we leave our country or even our state. Be a responsible traveler in your own city or hometown!

View it through the eyes of a visitor and educate others to do so as well. You’d be amazed at what you’ve been missing that’s right outside your door.
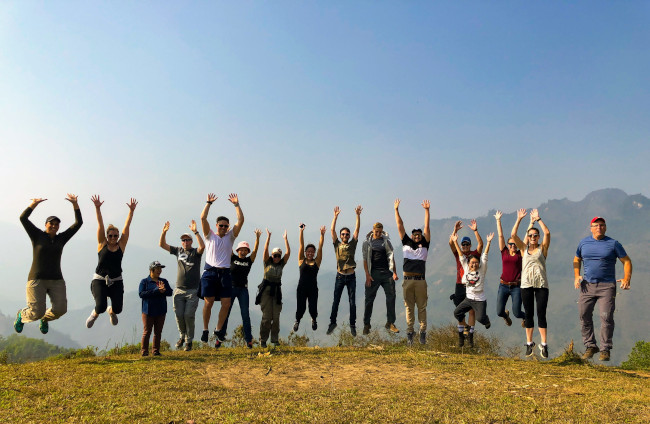
 

Be Kind

Lastly, Be Kind

We need more of that in the world.

19 Comments on How To Be A Responsible Traveler

Liebster 2019 Award Nomination

I am incredibly humbled and blown away by being nominated by fellow blogger Emma, from TravelFace, for the Liebster 2019 Award. I received the nomination during 2018 but, with the…

I am incredibly humbled and blown away by being nominated by fellow blogger Emma, from TravelFace, for the Liebster 2019 Award. I received the nomination during 2018 but, with the holidays and travel, deferred my nomination for the 2019 award year.

After having a rough few months of personal issues, minimal travel and just feeling generally meh, it’s amazing to see someone of her caliber taking the time to read my blog and really enjoy it!

Thanks so much for the nomination, Emma! I’m honored and wish you the best of luck with your nomination as well. 🙂

Make sure to check out Emma’s blog for amazing travel advice and who she’s chosen to nominate for this awesome award!

So….You might be sitting thinking, “Okay Andy, what exactly IS the Liebster Award?

The Liebster Award

The Liebster Award an online-only award created back in 2011 as a way for bloggers to be discovered and promoted by other bloggers, to help increase readership. Bottomline: it’s a blogger-to-blogger award.

“Isn’t that counter-intuitive? Shouldn’t you have ‘real’ readers?”

Of course! But this award is a fantastic way to spread the word of young blogs which helps us gain traction.

Fun fact!: The word ‘Liebster’ is German and translates to kindest, nicest, dearest, beloved, pleasant, valued and welcome.

So here are the rules for the Liebster Award:

  • Thank the blogger who nominated you with a backlink to their blog.
  • Display the award badge somewhere on your blog. Add it to your sidebar or include it in your post! The Global Aussie provides really awesome images here that you can use.
  • Answer the questions that the person who nominated you asked.
  • Pass on the kindness! Choose 5-11 blogs you would like to nominate.
  • Ask your nominees 10 creative questions, of your own choice. Mine are travel related but yours can be about anything!
  • List the rules in your blog post.

Please note: The official 2019 rules have NOT been posted yet. Once They are, I will update this post with the up-to-date rules, should they change.

Once you have written and published your post, you then have to:


Questions From Travel Face to Thousand Mile Boots

1. IF YOU HAD TO LIVE IN ONE COUNTRY IN THE WORLD, AND NEVER TRAVEL AGAIN, WHERE WOULD IT BE?

Honestly, I’ve thought about this because I’d love to live as an expat somewhere when I ‘retire’ but the issue I run into is which country!? My tastes are constantly changing with each new travel experience so today’s answer might not be tomorrow’s.

For now, I’d say Vietnam. It’s got the beach, mountains, incredible weather (minus monsoon season), the food is the best I’ve ever had and the people are beyond incredible. I dream of going back someday! Plus their Full Moon festivals are the best and you don’t want to miss out on Tết.

2. WHAT IS YOUR BEST SUSTAINABLE TRAVEL TIP?

Always carry a reusable water bottle. I cannot stress enough how important these little suckers are. Studies estimate about 300-500 billion plastic bottles are used and tossed, globally, and those numbers are set to increase over the next decade! By carrying a reusable water bottle you’re cutting down on how much plastic ends up in landfill which is better for non first world countries and the planet as a whole.  

3. DO YOU HAVE A SONG THAT REMINDS YOU OF TRAVEL, AND WHY?

I don’t really have a song that reminds me of travelling but there is a song that my husband, Alex, puts on every time we begin a road trip. ‘Radioactive’ by Imagine Dragons. I have no clue why that’s become ‘our song’ but we honestly don’t start any trip without first playing it. I think it has something to do with our deep desire to be post-apocalyptic bad asses, taking on the world together. You know….that sort of thing.

But we’re weird like that.

4. WOULD YOU RATHER BE FLUENT IN ONE LANGUAGE, OR HAVE THE ABILITY TO UNDERSTAND, BUT NOT BE ABLE TO SPEAK IN ALL LANGUAGES?

This is an easy one. I’d rather have the ability to understand but not be able to speak all languages. Something I learned from travelling is that a genuine smile and kindness goes way beyond language barriers. And just learning a few words, like ‘hello’ and ‘thank you’ goes much further with people than you being fluent in their language.

Subsequently, by understanding all languages, you gain the advantage in any situation: making a purchase, picking up suggestions of local places to go, or, more importantly, protecting yourself. On a lighter note: it makes eavesdropping a lot more fun!

5. IF YOU COULD CHANGE ONE PART OF TRAVELLING, WHAT WOULD IT BE?

How expensive it can be. This is a gray area since it really depends on where you’re going and your style of travel. But in general, booking a flight to anywhere can be expensive and while I’ll happily eat oatmeal for months to finance a trip, it breaks my heart to hear people say they cannot travel because ‘they can’t afford it’. I honestly believe travel is good for the heart, mind and soul and want everyone to have the opportunity to do it. Of course, if done right, the money spent on your trip can go to fuel the local economy but still…Can we at least make the plane ticket cheaper?

6. WHO IS YOUR IDEAL PERSON TO BE SAT NEXT TO ON AN AEROPLANE?

This is a tough one as I’ve been blessed with an array of really awesome seat mates. One thing they’ve all had in common was kindness. Even if they weren’t talkative, most people I’ve encountered are pretty nice and will get up when you need to use the restroom or help flag down a flight attendant. I think my favorite seat mate was an older Canadian lady, who was flying home, who was funny, chatty and kept apologizing for saying ‘sorry’ so many times.

7.  WHAT IS THE MOST UNUSUAL FOOD YOU HAVE TRIED WHILST TRAVELLING?

There were a few things, actually. The first trip I went on was to Morocco where I ate a camel burger which, honestly, tasted like a standard beef burger. They also served us lamb brain but just looking it was unappealing (you can’t see me but I’m gagging at the memory). My husband ate some….said it tasted like unflavored gelatin. When I went to Vietnam I had snake liquor and yes, there was a snake in it. It wasn’t my favorite, let’s just leave it at that.

8. WHAT DESTINATION HAS SURPRISED YOU THE MOST (GOOD OR BAD!)?

Ottawa, ON, was probably the most surprisingly awesome place. Since I’m gluten intolerant it can be difficult and stressful to travel because I have to be SUPER careful of what goes into my food. The foodie scene in Ottawa is real and I found tons of amazing eateries, bakeries, diners and small food stands that were incredibly delicious and all of them had a gluten free option! I was amazed and it must have shown because every vendor laughed at my surprise.

Besides the food, there were so many festivals going on in every beautiful part of the city, which, by the way, was probably the cleanest metropolis I’ve ever been to! There were tons of museums, tours of parliament, mini markets, outdoor activities, boutique shops, I could go on forever.

The biggest thing that surprised me was how much I fell in love with Ottawa. When I boarded my flight, I was apprehensive because my pre-trip research did not yield great results as to what to do, see and eat in the capital city. Man, was I blown away! It’s definitely a city I’m itching to go back to.

9. HAVE YOU EXPERIENCED ANY ACTS OF KINDNESS WHILST TRAVELLING, IF SO WHAT IS YOUR MOST MEMORABLE?

I was taking a red-eye flight across the US and in the middle of the trip I had a panic attack. I was trying to be quiet as everyone was sleeping, but I just couldn’t calm down. All of a sudden, the gentleman next to me woke up and asked if I was okay. At this point, I could barely breathe much less speak. Suddenly, he grabbed my hands and began massaging them. Within minutes I was calm and the panic attack was gone. I thanked him, shocked and embarrassed at the whole situation, but he just smiled and went back to sleep like nothing ever happened.

10.  WHAT ITEM HAVE YOU FOUND MOST USEFUL TO HAVE WITH YOU WHILST TRAVELLING?

I hate to say it but my cell phone has been the most useful thing ever. My phone doesn’t require me to change out my SIM card for most countries which means, if I want, I can be constantly connected no matter where I go. It has my music, movies/tv shows and books for long flights or train rides, my travel apps so I can use a global clock, have a digital itinerary that provides me up-to-the-minute delays or changes, easily convert my money, to check in with family and gives me tips on local things to do. While I also love disconnecting sometimes, knowing I have it with me, knowing it is the most powerful tool I have, makes me feel more secure traveling.

11. HOW HAS TRAVEL CHANGED YOUR LIFE?

I truly believe that travel has changed me for the better. It has opened my eyes to so many new and interesting places, allowing me to meet unique people and try an array of foods I’d never had before. Through traveling, I learned so much about myself; traits I like, don’t like and what I can do to be a better me. It’s also given me the courage to overcome fears, stresses and anxieties that no longer plague me. And I found that I love more deeply and have connected better with my husband who’s been my amazing travel partner for years.

Ultimately though, travel has shown me that our world, and the people in it, are more precious than anything in the universe and deserve respect, love and kindness.

My Nominees

  • Travel Interesting – I absolutely love Nicky’s blog! She’s super adventurous, provides really awesome hiking information and has great tips on how to be healthy while traveling. 
  • The Bamboo Traveler – If you’re looking for solo travel information, Julie’s blog provides you with everything you need to begin. She’s honest and upfront about the good & bad of solo traveling and provides really useful travel tips.
  • Time Given Us – Heading to Mexico? You NEED Jaime’s blog. She’s been living in Mexico City and has learned all the ins and outs of this beautiful country, including where to travel, when and what delicious foods you should be tasting.
  • The Detour Effect – Claire is pretty much a badass. Her music recommendations are awesome, her travels detour her to some really cool off-the-beaten-path places and she’s basically the guru of hitchhiking. 
  • Curious Travel Bug – Brianna is definitely a blogger I’m looking forward to following! Her photos are incredibly beautiful and her writing is so detailed you really feel like we are  on the journey with her. 

Questions from Thousand Mile Boots

  1. What country have you not visited yet that you’re dying to travel to?
  2. There’s tons of amazing foods around the world, which is your favorite?
  3. What do you do to stay healthy while traveling?
  4. Is there anything you miss about home when you’re away?
  5. What was one thing you were scared to do but did anyways?
  6. What is your #1 travel tip that you’d want to share with the world?
  7. If you couldn’t travel anymore, what other job/career would you choose?
  8. What language do you find most beautiful?
  9. What mode of transportation would you rather travel by?
  10. More and more people are traveling, nowadays. Do you think that’s good or bad? Why?

————-

And that that’s it! That’s all there is to the Liebster Award. I cannot wait to read my nominees’ responses to my questions. 


No Comments on Liebster 2019 Award Nomination

How To Get A Popular Wilderness Permit Using These Useful Tips

Parks are becoming more popular which means grabbing a wilderness permit for the best trails is getting more competitive.  Since major national parks like Yosemite, Yellowstone and Grand Canyon received…

Parks are becoming more popular which means grabbing a wilderness permit for the best trails is getting more competitive. 

Since major national parks like Yosemite, Yellowstone and Grand Canyon received hundreds of thousands of visitors each season, they each have their own set of trail quotas which help to maintain the wilderness aspect of the backcountry as well as negate wear-and-tear on the trails.

Holding trail quotas and requiring permits isn’t a recent concept for these parks – most of them have been doing it for decades! It’s just the public has recently changed it’s tune about visiting these parks and now there’s a huge influx of people.

Weekend warriors heading out for adventure? Check.

Large families looking for an inexpensive vacation? Check.

Hipster backpacker with his vintage camera claiming the last walk-up permit? Check.

And while I encourage everyone to get out into these amazing parks and truly connect with nature….I also really want that permit too.

So I’ve come up with a few clever tips to make it easier to get one!

How To Get A Popular Wilderness Permit Using These Useful Tips


Attention: My post may contain Amazon affiliate links!


By the way, if you haven’t read it already, you should check out my recent post, How to Plan an Awesome Trip and Get that Wilderness Permit, which details how to first plan your trip.

So, let’s get right down to it!


campsites national park california

Enter Through a Different Park

I don’t think a lot of people realize that many parks butt up next to each other with open boundary lines.

That means, if you want to backpack in Yosemite, why not start with a trail head in the Sierra National Forest? Or start in Ansel Adams Wilderness and trek north into Yosemite?

If you plan it carefully, you can enter through lesser known national parks or forests and trek through the more popular ones.

You’ll have to sacrifice additional miles but it’s worth it!


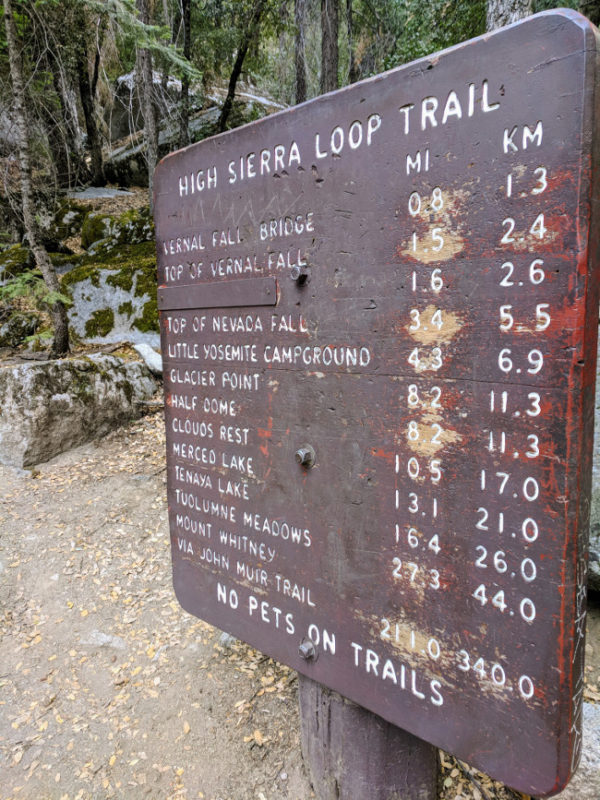
Yosemite Trail Board

Choose a Lesser Known Trail or Starting Point

Just because it’s ‘always done’ one way, doesn’t mean that’s the best way for you.

Try going the opposite direction on a popular trail!

As an extreme example: If you’re looking to do the Appalachian Trail, which most do South to North so they’re always in temperate weather, try for a permit for North to South. (Note:This direction is best for experienced thru-hikers so bare that in mind)

If cold weather and heat don’t bother you much, you’re likely to get this permit.

If you’re not looking for a specific trail and just want to explore a popular park, look for lesser known trails.

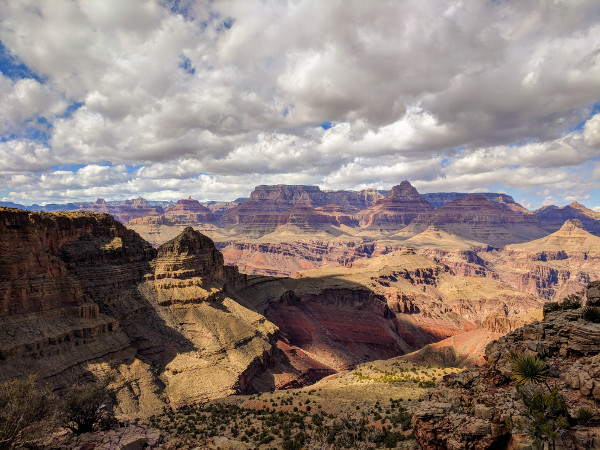
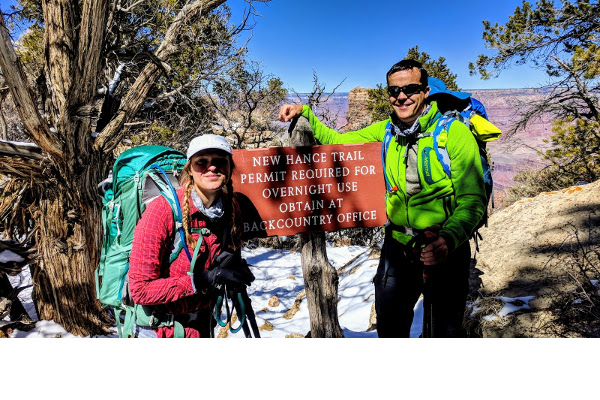
Take the Grand Canyon for example: forgo iconic trails like Bright Angel or Kabob for trails like New Hance or Grandview.

These are less populated with means you’ll end up with an overnight permit and more solitude. Win-win!

Related: The Ultimate List of Backpacking Luxuries

Smaller Group = Better Chances

Every heard the saying “three’s a crowd”? This is particularly true for getting wilderness permits.The more people in your group, the less chance you have of getting that permit.

Alex and I had a permit for 12 people (Yep! 12!) for the Subway trail. Problem? It was for a Monday, the day we were leaving Zion National Park to head home.

When we checked with the permit office to see if had any cancellations for Saturday or Sunday we discovered 8 spots were open for Saturday.

We still had 12 people.

Unfortunately we were out of luck but if you keep your group small, around 1-6 people, you’ll have a greater chance of success.


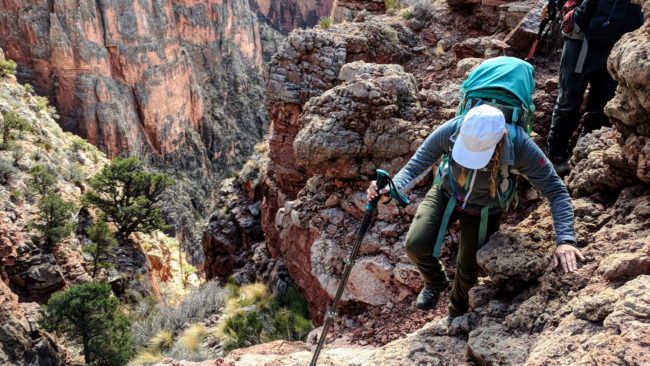
Grand Canyon

Go in the Off Season

I absolutely love trekking in the off season since it’s less crowded, although you sometimes experience less-than-perfect weather.

If that’s not an issue, try for permits in between November and April. You’ll find a lot of trails are still open and permits are easy to come by.

Also try for cool temp areas in the summer and warmer areas in the winter, if possible.

I’m lucky to live in southern California so it’s pretty darn easy to go in the off season for most places. I head to the mountains in the summer and to the desert in the winter.

One of my favorite off seasons trips was when we nabbed Yosemite Valley campsites for New Years weekend. Hardly anyone was there and while we did have cold weather and less sunlight, it was incredible to hike up to Yosemite falls with only a handful of others in sight.

Related: The Ultimate Care Guide for Your Backpacking Gear


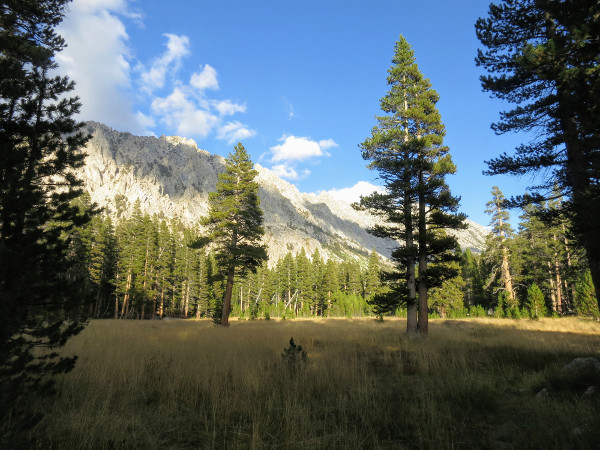
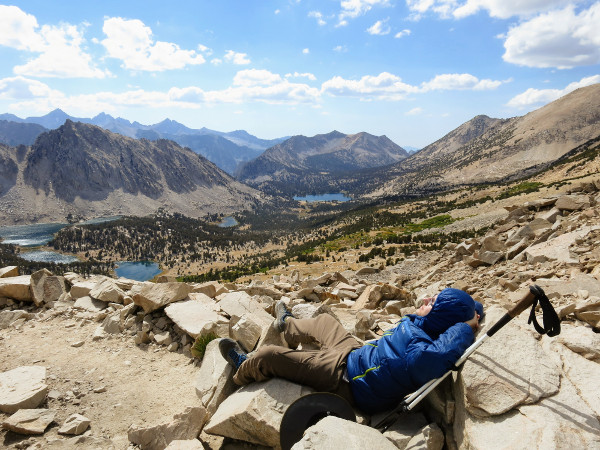
Cottonwood Lakes, CA

Opt for Weekday Permits Rather than Weekend

There’s something to be said of Weekend Warriors but when it comes to grabbing a permit for places like Yosemite, the weekend might not be your BFF.

Since most Americans work Monday to Friday, weekends get filled very quickly with individuals and families looking to hit up the trails.

This means the likelihood of you getting that super popular permit is…less likely.

Going back to our Subway Trail permit example, Alex and I put in the application for either a Saturday, Sunday or Monday trip and, of course, we got approved for Monday which didn’t really work for us.

Instead try for a Tuesday to Thursday permit which are much easier to come by.

Monday & Friday are good as well but you’ll be competing with those heading out on a 3-day weekend.


Be Flexible with Your Dates

Okay, so you’re telling me to go in the off season but still have flexible dates? Are you kidding me?

Unfortunately, nope.

Just because you’ve submitted your application for the off season and asked for a Tuesday permit doesn’t mean you’ll get it. You’re just more likely to get it.

Some places have a very limited quota for how many people can be on each particular trail but permit officers do their best to provide permits for everyone.

This just means you may still have to be flexible with your trekking dates.

Related: 10 Essentials for Hiking & Backpacking


Yosemite From Vista Point

Apply as Far in Advance as Possible

This one is a given as you should always apply for your wilderness permit as far out in advance as you possibly can.

Like I mentioned in my earlier post, How to Plan an Awesome Trip and Get that Wilderness Permit, you’ll need to check how early you can apply.

For most national parks and forests it’s about 6 months but for others it can be 3 months or even 6 weeks.

Check the government website for the park you’re going to to get the latest information.


Have Everyone in Your Group Apply

So I know I already said that the smaller your group, the higher the chances of you getting that permit you want.

However, if you have a larger group you can ask each person to submit the same application which increases your chances of getting it.

This is especially helpful for super-hard-to-get permits like Havasupai, Colorado River rafting and Half Dome.

Even if two or three people end up with the permit, you can always cancel whichever you don’t need.

In my experience, this is the best possible way if you have a large group since getting approved for a 4 person permit is easier than getting one for 8 people.

If two people in your group get a permit for 4, then all 8 of you can go! Simple math.

Related: The Ultimate List of Backpacking Luxuries


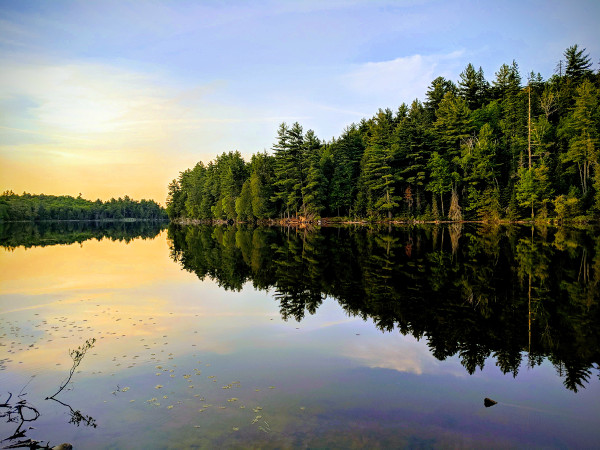
Tepee Lake - Algonquin Park

Try for a Walk-Up Permit

When all else fails, try for a walk-up permit the day of or before you’re planning to head out. A walk-up permit is a first come, first served permit which popular parks will hold for the day of or day before treks.

Some places offer a limited number of these so I recommend calling head to find out how many the permit office offers and when they open. Then, be there at least an hour before.

Some might think this is risky but you’d be surprised at what you can get!

Want an day-permit to hike Mount Whitney, the tallest peak in the continental USA? It can be done this way.

Want to see The Wave in Antelope Canyon? Sure fire way to get a last minute permit.

You can even get them for thru hikes like the John Muir Trail via Lyell Canyon trailhead although I would only do that if you already have food drops planned out.

While it does leave everything up to chance, walk-up permits can be an awesome and spontaneous way to shake up your trip.


Honestly, there are tons of tips for getting that permit but the best way is to apply for it early and often.

Always check what the application requirements are and, if looking for a walk-in permit, what restricts are in place.

And never, ever go out into the backcountry without a valid permit. You may not run into a wilderness ranger but if you do, the fine for being caught without a permit is hefty.

So be smart, do your research and use these tips to help secure that wilderness permit!


Got a tip that I didn’t mention? Feel free to leave it in the comments below! 🙂


1 Comment on How To Get A Popular Wilderness Permit Using These Useful Tips

How to Plan an Awesome Trip and Get that Wilderness Permit

Just a few days ago a friend asked me how she could go about getting a wilderness permit. She was planning a trip but, having never planned one before, she…

Just a few days ago a friend asked me how she could go about getting a wilderness permit.

She was planning a trip but, having never planned one before, she was unsure of how the wilderness permit process worked.

Honestly, I’d never thought about it before since it’s become second nature to me. I usually plan my trip, apply for the permit and BAM! Permit has been granted.

Of course, there’s no magical genie at the other end of the computer granting wilderness permits – if there was I’d be able to get that darn permit for Yosemite I apply for…each year.

So that got me thinking, if she’s unsure of how to obtain a permit, does that mean others are as well?

Perhaps that’s the root cause as to why my friends are reluctant in planning their own trips and seem to rely on my husband or myself to plan it.

Well…your secret is out!

And I’ve come up with the most thorough explanation of the wilderness permit process, as well as advice on picking out the date, park and trail best suited for your trip.

But first….

Why Do I Need to Apply for a Wilderness Permit?

With hundreds of thousands of people hitting the parks across the USA, particularly in the summer, the trails have been getting more foot traffic than usual.

This means that parks have to set permits and quotas for each trail for each day. This helps to regulate how many people are out in the park, where they’re supposed to be each day and help cut back on the wear-and-tear of the trails.

Wear-and-tear? Why is this a concern?

Well, to put it lightly, people mess up the trails more often than they think. And it’s expensive and time consuming to send rangers out to fix them.

How exactly do humans mess up these trails? Their just walking on dirt, right?

To a point, they do! Most people stick to the trail but some will try to cut through brush to shorten a trek or gain access to a specific area (all in the name of selfies). I’ve also see people cut switchbacks causing minor rock slides which disturbs deliciate vegetation erods the trail.

Permits also help to provide everyone with a solitary experience which is what a lot of backpackers look for when heading into the backcountry. It’s not as much fun trekking when you’re stuck on a trail behind a long line of people.

So bottomline, permits help to maintain the wilderness experience for everyone, protect the environment and keep you safe.

Wait. Keep me safe?

Permits also help rangers keep track of everyone in case of emergencies or if you get lost and they need to send Search & Rescue.

Well I can’t get a permit for my trek – I’ll just go without one.

NEVER go into the backcountry without a permit unless other rules apply! If caught by rangers you could be sent out of the park and potentially be slapped with a heavy fine. And while you might get away with saying you “can’t find it” or perhaps not even run into a ranger, still, it’s not worth it.

So, now that you understand why permits are important, let me help you get one!


How to Plan an Awesome Trip and Get that Wilderness Permit


Attention: My post may contain affiliate links! I may earn from qualifying purchases.


Decide On Where You Want to Go

Are you looking for high mountains and glacier fed streams? Or perhaps sandy deserts, spotted with cacti and brightly colored desert roses?

Whichever tickles your fancy, you’ll first want to determine where it is you want to go.

I’m not talking about which parks or trails – think broader.

What type of climate or environment do you want to explore? Are you okay with heat or do you do better in the cold? Do you get altitude sickness if you’re above a certain elevation?

All these and more will come into play when deciding where you want to plan your trek.

Also, keep in mind how difficult it is to get to the area and how far away it is.

You might rethink that overnight trip if it takes you 12 hours to drive there or requires an off-road vehicle that you don’t have.


Cottonwood Lakes Trail

Decide When to Go

Does it really matter when I go?” Well…yes, it does matter.

It’s best to plan ahead for which trail you want and when, then mark your calendar to remind yourself of when to apply for the permit.

To increase your chances of getting the permit you want, perhaps go in the off season.

Typical North American backpacking season is late spring to mid-fall since temps are warmer and days are long. But that doesn’t mean the rest of the year is off-limits.

While some trails will close during the off season, a lot are still open!

If the cold & snow doesn’t bother you, try snow camping in Yosemite during the winter or grab a permit for the Mojave desert in the spring but do the trek at night during a full moon. Both are incredible experiences!

Another useful tidbit is to go for weekday permits instead of weekends. You’re more likely to get the permit and have the trail to yourself.


Yosemite Trail Board

Choose the Right Trailhead & Plan You Route

Yes, the Pacific Crest Trail is pretty darn awesome (all 2,650 miles of it) but if you’re more of a casual backpacker, you may to want to try something a bit more manageable.

Sorry to say: this is where you need to be honest with yourself.

If you choose a trail that has extreme elevation changes or requires long mile and you’re not able to rise to the challenge, you could find yourself in harms way.

Use your best judgement to choose trails that are within your experience and hiking level.

Also look at the park’s main website to see if there are any restrictions or regulations that might alter your trip plans.

Pro-Tip: If there’s a longer trail you’ve been itching to do, try breaking it up into smaller, manageable miles with more days. It makes for a pleasant experience.

Related: The Ultimate List of Backpacking Luxuries


Packing for Algonquin Trip

Find Friends to Go with You

Solo or a group that’s completely up to you! I’ve never done a solo trip (it’s on my bucket list) so I tend to go with a small group of people.

If you plan to do the same, check with the permit office first as you might only be able to get your permit for a limited number of people. Some parks have limited quotas.

This is especially true in places like Yosemite and Grand Canyon where the foot traffic can range from hundreds to a thousand a day!

Pro-tip: The less people on your permit, the high the chances are that you’ll get it.

I usually stick to about 6 people max unless it’s a sparse area.


Sunset in Algonquin Park

Have a Backup Plan & Flexible Dates

Just because you’ve submitted your permit and have paid the fee, doesn’t necessarily mean you’ll get the permit.

For highly sought after treks, you might be placed into a lottery – this happens with sites like Half Dome and rafting the Colorado River. Since the permit office receives a high number of applications, you’ll probably lose out the first few times.

That’s why having flexible dates for a particular trail or a backup is always good to have.

Related: The Ultimate Care Guide for Your Backpacking Gear


Yosemite From Vista Point

Mark Your Calendar & Set a Permit Notification

Permits for popular sites so FAST!

Backpacking has become more popular over the last 5 years with more and more people hitting the trails to beautiful destinations. That also means it’s getting hard to obtain those coveted permits.

Typically, permits are booked anywhere from 3-6 months in advance depending on the park. That means if you want to get that awesome Yosemite wilderness permit for July, you better book in January.

Some permits are only reservable during a specific time of year.

For example: permits for any date to trek to Havasupai can only be obtained starting February 1st. So mark your calendar!


Tepee Lake - Algonquin Park

Use Recreation.Gov to Apply for Your Permit – Spam the Refresh Button

I honestly believe Recreation.Gov is the best gift to backpackers. It’s expansive, easy and you usually get your permit confirmation within minutes.

It’s also the site most national parks use for wilderness permits and will send you alerts for when certain coveted permits become available.

It also allows you to submit permit applications for several trails so if you aren’t able to get your first choice, you’ll likely get your second choice.

Keep in mind you’ll have to pay up front for your permit so have your account already established, a credit card ready and spam that refresh button like it’s Comic Con.


campsites national park california

Email or Mail In Permit Application

Check the application directions for where you’re applying for your wilderness permit! I’ve made this mistake before and totally missed out on an awesome trip.

While most parks like Yellowstone and Yosemite allow you to spam the website for a permit, other places like the Grand Canyon require you to either mail in or fax your application.

Yes, mail in or fax. Like, with a fax machine.

Submitting your application the correct way will make it easier on the permit off and yourself – it sucks waiting around for your permit only to hear you did it incorrectly. So, no permit.

You may also want to get the phone number for the permit office of the park to check in on the application process.

Some permits are given immediately, usually online portals, but others will take weeks. Be patient.

Related: The Ultimate List of Backpacking Luxuries


Pay for Your Permit

There rarely is such as thing as a free wilderness permit. And in the 4 years I’ve been backpacking I don’t think I’ve ever come across one.

Some are inexpensive and will cost around $10 for the permit, plus $5 per person. Others, like the Havasupai permit I received, costs $150 per person! Now that’s on the extreme side but some permits aren’t cheap.

Take into account the number of people you’re trying to get the permit for as a lot of parks will charge a permit fee (usually per night), plus a fee per person and/or vehicle. The more people on the permit, the more expensive it will be in some cases.

Usually you can pay ahead of time for your permit (done upon approval) but have a credit card or cash with you if you have to pick up your permit at an office.

Related: The Ultimate Care Guide for Your Backpacking Gear


Zion NP - Hidden Canyon Trail

Pick Up Permit Before Your Trip

Do yourself a favor and find out where the permit office is before you head out for your trip.

Usually the offices are inside the park or close to it but hold normal business hours. This means if you don’t make it before they close, you’ll have to wait until the next morning to get your wilderness permit.

I usually factor in how long it’ll take to get to the permit office and then add the time to the trail head.

Allow a little extra time for traveling through traffic or getting to a walk-in campground if using one.


Swap - Yosemite Valley From Nevada Falls

Always Carry Permit with You

I cannot stress this one enough. Always, keep the wilderness permit with you.

This is your ticket into the backcountry and proof that you’ve gone through the proper channels.

Like I said, if a ranger catches you without a valid permit you could be turned away from the park and/or hit with a heavy fine.

Best to put that permit in a safe place and have it ready to show if asked by a ranger.


So there you have it! It sounds daunting but it’ll becomes second nature and you’ll be booking trips like a pro.

Just remember to follow the rules of the park, carry your permit with you and have fun!

It’s the backcountry after all….and it’s calling.

4 Comments on How to Plan an Awesome Trip and Get that Wilderness Permit

Awesome Last Minute Bay Area Campgrounds

The Bay Area is really fortunate to be surrounded by beautiful state and national forest & parks, along with some really awesome campgrounds. No matter which direction you turn, drive…

The Bay Area is really fortunate to be surrounded by beautiful state and national forest & parks, along with some really awesome campgrounds.

No matter which direction you turn, drive a few hours (or less) and you’re bound to hit a park that boasts beautiful landscapes, great hiking trails and scenic camping spots.

Of course, most places require a 6 month advance reservations. You will need to visit Reserve America for those campsites. 

And you’ll need to spam your refresh button like it’s Comic-con for popular sites.

I’m looking at you, Yosemite.

But don’t let that get you down! There are several first come, first serve campgrounds that cater to those who wish to just get away from the city for a weekend.

So take a look at my list for Bay Area Campgrounds that don’t require a reservation!

Awesome Last Minute Bay Area Campgrounds:

No Reservation Required


Attention: My post may contain affiliate links!


campsites california sunshine

Los Padres National Forest

Los Padres NF is extremely large, spreading from just north of Los Angeles all the way to Big Sur and encompassing almost 2 million acres.

Though it’s a 3-4 hour drive south of San Francisco, with rolling hills dipping into valleys and beautiful views at every turn, it’s well worth the drive. Take the 1 down the coast for a more scenic drive!

And since this area is right on the coast you can head down to the vista turn-outs and beaches to enjoy a sunset or beach picnic.

This northern area of Los Padres also has miles of hiking trails and streams which offers some secluded swimming and wading areas. Always use caution and only use spots which are marker for swimming.

No reservation campgrounds include:

Nacimiento Campground

$20/night + 1st vehicle, $10/night 2nd vehicle with an RV max length (no hook-ups).

There are 9 campsites and a few vaulted toilets, as well as, fire ring and tables. Bear boxes are not necessary in this area but food should be stored inside a locked vehicle.

There is no water so bring water with you. For those who have backcountry water filters, you can use the stream behind the campground to fill water. Otherwise, bring it with you.

This campground is pet friendly but may have leash laws. Check with the ranger station ahead of time.

Related: 6 Awesome Last Minute L.A. Campsites: No Reservation Required


Photo by Jon Flobrant on Unsplash_Small

Sonoma Coast State Park

This place is a beach-lovers dream destination! Located about an hour north of San Francisco and just east of Santa Rosa, you’ll find miles of public beaches with gorgeous coastal views.

While there isn’t much in the way of hiking, there is tons of swimming, fishing and looking for seashells.

Did I mention wine tasting, as well?!

Sonoma County is known worldwide for it’s beautiful vineyards and delicious wines – take a short drive into Alexander Valley for some amazing vintages.

If you don’t want to cook over a campfire, a short drive into Duncans Mills offers quaint shops and restaurants.

I highly recommend stopping at Mr. Trombly’s Tea shop for loose leaf teas before heading home.

No reservation campgrounds include:

Willow Creek Environmental Campground

$25/night – 2 night max. This is a tent-only site.

Located just off the Russian River, this shady campground comes with 11 walk-in campsites, each with its own fire ring, food locker and picnic table.

Remember that walk-in campsites mean you’ll park in a communal parking lot and walk your items into the camping area. No vehicles are allowed within the campground.

This site isn’t pet-friendly so best to leave Fiddo at home and enjoy a beautiful setting of tall evergreens and eucalyptus trees.

This site has vaulted toilets but no running water so make sure to bring water with you.

While there isn’t much in the way of hiking, you are allowed to swim in the river which is cool and refreshing.

Pro-Tip: For a awesome, secluded site, grab sites 8, 9, or 11 which have a lot of privacy and pathways leading down to the water.


Mount Tamalpais State Park

Mount Tam, as it’s affectionately known as, rises above Marin county and is easy to see, on a clear day, from a high rise in San Francisco. Barely a 45 minute drive north of the city, this gem of a state park is bursting with fun things to do.

Grab your bike and ride through the tall redwoods or down the winding roads throughout the park.

Check out Stinson Beach or Muir Woods using one of the many hiking trails. Take your swimsuit with you and make a day at the beach! Just know that fog is common so you may wish to pack a sweater as well.

On a clear, moonless night, you can catch an astronomy lecture at the Mountain Theatre (amphitheater) – don’t forget to peek through the visiting astronomer’s telescopes!

No reservation campgrounds include:

Pantoll Walk-In Campground

$25/night, $8 per vehicle, per night. Max of 2 night stay. Tent-only campground with ample shade. No RVs.

Since this site is a walk-in campground, you won’t be able to sleep next to you vehicle. Thankfully, the parking lot is only 300ft away so towing your things back and forth is pretty darn easy.

There are 16 pet-friendly campsites, each with it’s own ring and picnic table. I believe food lockers are available but you might want to call ahead.

There is also flushing toilets (no showers) and drinking water available.

Pantoll is a beautiful area so it fills very quickly so make sure to arrive early in the morning and stalk out a spot. The campsites closer to the parking lot are larger but the ones further back offer more privacy.

If you head out there on a moonless night you’ll get beautiful stars.

Pro-Tip: Bring a hammock with you as there’s tons of trees for relaxing.

Bootjack Walk-In Campground

$25/night, $8 per vehicle, per night. Max of 2 night stay. Tent-only campground with ample shade. No RVs.

If you can’t get into Pantoll, Bootjack is a nice alternative. It’s a 15 site, walk-in campground with the parking lot being really close so you won’t have to lug your items too far.

While this campground is pet-friendly, with running/drinkable water and flushing toilets, there are no fire rings.

Instead you get vintage grills to cook over! Fun and still useful for s’more making, but if you’re looking for that nostalgic campfire experience, this isn’t the campground for you.

The campsites and grounds recently went through a renovation so everything is super nice and has several trailheads which is really convenient! There’s also a trail leading down to Stinsons Beach.

In recent summers, wasps have become an issue but they go away at night and only show up in the summer.

Related: 6 Awesome Last Minute L.A. Campsites: No Reservation Required


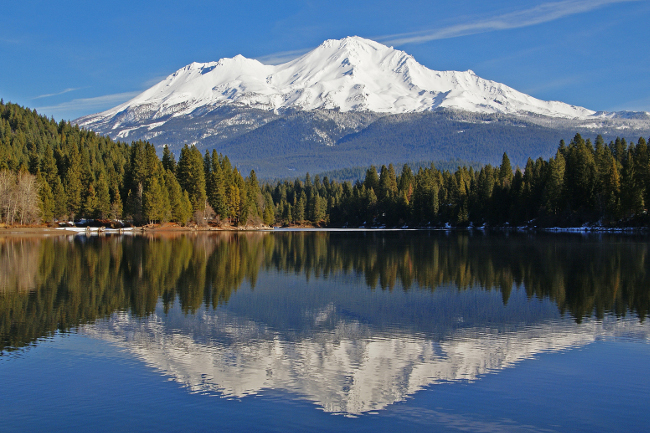
mount shasta trinity campgrounds

Shasta-Trinity National Forest

If you’re looking to really get away from the Bay Area, a 4 hour drive up to Shasta-Trinity National Forest is definitely the way to go.

Breathtaking scenery, majestic mountains and the clearest mountain lakes make for the perfect camp setting.

Besides nature viewing, there are several places to go rock climbing (call ahead for climbing conditions) and miles of interconnected hiking trials.

Most notably is the Pacific Crest Trail (PCT) which runs through Shasta-Trinity, connecting the Canadian and Mexican borders. Hike one of the off-branch trails to get to the PCT and log those miles!

If you’re looking for a refreshing swim (I mean icy cold), Shasta-Trinity offers several designated swimming spots including Beehive Point Shoreline, Stoney Creek Swim Area and Clark Spring Beach.

Looking for some thrilling, bike paths? Shasta-Trinity is a mountain rider’ dream with several long trails leading out from Shasta Lake. Be sure to check out Clikapudi Trail which is popular among riders.

No reservation campgrounds include:

Mary Smith Campground

Something interesting I learned about this campground is that 80% of the sites require a reservation, which can be made 4-60 days in advance. This is why I included this campground in my list.

Plus Mary Smith Campground was rated one of the most beautiful lake campground in the California, how could it not make the list?

Mary Smith has two different types of sites: Traditional and Glamping. I’ll break them both down for you.

Traditional Camping:

$11/night + 1st vehicle, $5/night for 2nd vehicle. 11 Tent-only sites, no RVs. Walk-in campground which means you will not be camped next to your vehicle.

Each site comes with a fire ring, grill and food storage container, as well as lots of privacy.

There are several flushing toilets and drinkable, cold water. The campground is pet friendly but check for leash laws before heading over.

This campground fills quickly so make sure to get there early.

Pro-Tip: Get one of the further campsites, they offer more trees for privacy.

Glamping All-Out:

Glamping is basically the mash-up of traditional camping and glamorous amenities.

$85/night + 1st vehicle, $5/night for 2nd vehicle. These sites do need to be reserved in advance but double check in case you can get a last-minute reservation in the off season.

There are 6, large, canvas glamping tents (several are ADA compliant) each with its own queen size bed, linen & comforter, nightstand, lamps and rugs.

Out on the deck you’ll find adirondack chairs and a coffee table set up and ready for that perfect, brisk morning cup o’ Joe!

Each glamping site comes with a fire ring and picnic table for cooking.


And there you have it folks! 5 awesome campgrounds that are perfect for a last-minute get-away from the Bay Area.

Remember that many of these local spots are very popular in the summer so make sure to arrive at the campgrounds early to stake out a spot.

Some have more privacy than others, others come with more amenities, but all are beautiful and worth checking out.


Know of a no reservation, Bay Area campsite that’s not listed? Share it in the comments below!

4 Comments on Awesome Last Minute Bay Area Campgrounds

6 Awesome Last Minute L.A. Campsites: No Reservation Required

We’re now in full swing of summer and that means cookouts, pool parties, beach trips and more. To me nothing says summer more than going camping! But what campground is…

We’re now in full swing of summer and that means cookouts, pool parties, beach trips and more. To me nothing says summer more than going camping!

But what campground is open? How far to we have to travel? Don’t you need reservations?

Unfortunately most national and state parks DO require  reservations which tend to book up 6 months in advance. But don’t let that get you down!

Alex and I adore camping and know of several great spots when you want to take a last-minute trip.

Even better? These spots are within a few hours drive of Los Angeles, meaning you don’t have to go far to be in the great outdoors.

So back up the car and get rolling!

6 Awesome Last Minute L.A. Campsites:

No Reservation Required

angeles national park camping


Attention: My post may contain Amazon affiliate links!


campsites angeles national forest

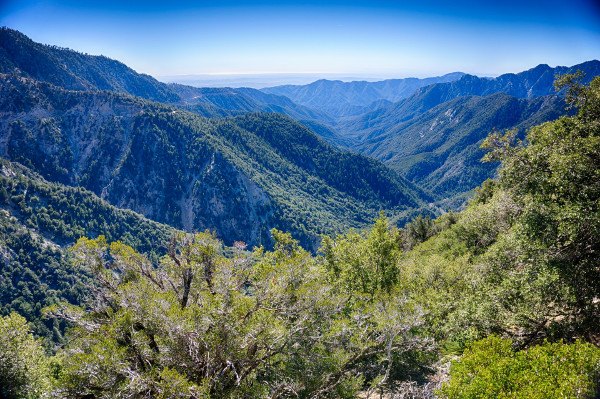
Angeles National Forest

Just north of Los Angeles is Angeles National Forest, 1,000+ square miles of diverse nature ranging from desert-like to pines and fir trees.

With multiple campgrounds, streams and trails it’s a great spot for weekend warriors or those looking to get out of Los Angeles for a few days.

Summer activities in the national park include multiple fishing spots, a shooting range, dog-friendly campsites and swimming at Pyramid Lake and the east fork of the San Gabriel River.

No reservation campgrounds include:

Chilao Campground

$12/night, tent and RV camping (size limit) available although there are no hook-ups or dump stations for RVs.

Bring water as there is no water at this site. There are picnic tables, fire rings, vaulted toilets, parking for up to 2 vehicles and it’s pet friendly (leash restrictions).

Crystal Lake Campground

$12/day for 1st vehicle, $5/day for 2nd vehicle. I believe this is a tent-only site so no RVs.

While you can swim & fish in the lake, it’s not recommended due to high levels of algae.

This campground offers 36 campsites with fire rings, picnic spots, shade and trails.

This is a pretty popular campground and fills very quickly on weekends – might be best to go on weekdays if possible.

The Crystal Lake Cafe,a local eatery, is located nearby as well with delicious meals if you need a break from campfire cooking.

Horse Flats Campground

$12/night, tent and RV camping (size limit restriction) available in 26 sites.

There is no water on-site so bring water with you. There are tables and fire rings in each site and 2-3 vaulted toilets. Also know there is a 2 vehicle max per site and the campground is pet friendly (leash restrictions).


campsites california

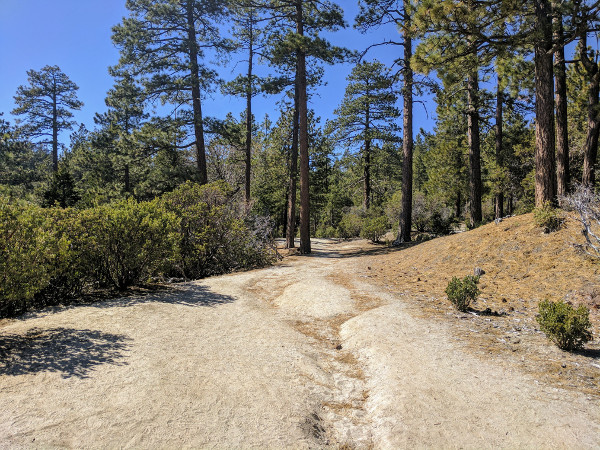
San Bernardino National Forest

This beautiful national forest is located east of Los Angeles and within a 3 hour car ride.

Nearby Lake Arrowhead and Big Bear Lake offer boating, SUP, fishing ( CA fishing license required), swimming and lovely scenery.

If you have an Off Highway Vehicle (O.H.V) there are a few dirt & paved trails for you ramble over.

There are miles of trails throughout the forest with backpackers being a common site.

Though there are only a few dog-friendly trails, Castle Rock Trail just outside of Big Bear is a great, 3 mile out-and-back hike which offers a stunning view of Big Bear Lake.

No reservation campgrounds include:

Big Pine Flat Family Campground

$25/night & 1 vehicle, $7/night for 2nd vehicle. There are 19 tent-only campsites with fire rings, tables and drinkable water.

There are several vaulted bathrooms with showers stalls available at nearby Serrano Campground.

Large pine trees offer great shade and spots to set up a hammock. The campground is dog-friendly (least restrictions).

Holcomb Valley Campground

$23/night & 1 vehicle, $7/night for 2nd vehicle. 19 tent-only campsites with fire rings, tables and bear boxes (must-use). Vaulted bathrooms only.

There is no on-site water so bring plenty of water with you. The campground is dog-friendly but dogs must be kept on leash.

Related: Awesome Last Minute Bay Area Campgrounds


campsites national park california

Sequoia & Kings Canyon National Park

With high peaks, pristine lakes and miles & miles of wilderness trails, it’s not hard to see why Sequoia & Kings Canyon are such a popular spot for camping!

You can go hiking trails for all levels, horseback riding, fishing (CA fishing license required) and swimming!

Keep in mind that pets are not allowed on trails but are fine in the campgrounds.

Sequoia & Kings Canyon also boasts the Crystal Cave which is a natural marble cavern located near the Sequoia Giant Forest.

Plan a full day there as the windy roads can take while to navigate through.

Unfortunately the only way to go in and explore is by going on the tour, which is not free. You’ll also have to purchase tickets ahead of time and make sure to wear something warm as it’s pretty cold in the cavern, even if it’s hot outside.

It’s definitely worth it so you may wish schedule the Crystal cave into your camping get-away!

No reservation campgrounds include:

Azalea Campground

$18/night with 2 vehicle max. 110 available tent and RV campsites (no dump stations or hookups).

Since most of the campsites are under evergreen trees, shade is in abundance and you’ll be within walking distance of the General Grant sequoia grove which offers plenty of short hikes.

There are flushing toilets (so snazzy!) and potable water within each camp loop and each site comes with a picnic table and fire ring.

Bear resistant food lockers are located in each campsite – you are required to use them for food storage at all times.

Related: Awesome Last Minute Bay Area Campgrounds


campsites california sunshine

Los Padres National Forest

Just north of Santa Barbara lies Los Padres National Forest. With it’s beautiful, rolling mountains and 8000’ elevation differences, this diverse landscape as so much to offer.

Los Padres enjoys a less-populated area so you’re almost always guaranteed to find one or two open sites at their Mt. Pinos campgrounds which usually requires a reservation. Book by Wednesday to reserve for the weekend, even at the last minute.

Los Padres also has elevations reaching as low as sea level, up to 9,000 feet which means you can enjoy a day at the beach or hop on a mountain bike and ride down the steep trails.

There’s also hiking, backpacking, climbing and O.H.V riding trails

No reservation campgrounds include:

Chula Vista Campground (WALK-IN)

If you want a campsite is remote, allowing you to feel like you’re in the backcountry but without the huge trek, check out this FREE campsite.

Chula Vista is a walk-in campsite, this means you’ll park your vehicle in the parking lot and walk about 500 yards to the camps. Not a big deal for those who wish to have a smaller, private campground.

There are 12 individual sites with fire rings available but the current fire safety level before planning on having a fire as this is a high risk area. You will also need to purchase a fire permit.

There are vaulted toilets but no water so bring in plenty of water.

There are no bear box/food storage so you will have to either bring your own bear box (like this one) or do the hanging method – just make sure you leave food at least 200 ft away from your tents.

A BIG plus about this site?

On weekends when there’s no moon, ameteur astronomers will come out with their telescopes and set up in the Chula Vista campground parking lot. What a wonderful way to spend an evening outside!

Just be careful when entering or exiting the parking lot in the dark so as to avoid disturbing the astronomers.


And there you have it! 6 spectacular last-minute campsites that don’t require a reservation, plus one is free!

Remember that most campgrounds require a reservation 6 months in advanced unless their walk-in or first come, first served.

And while some campgrounds will be more developed than others, these 6 are great for when you want to get out of town this summer.

Just make sure to arrive early to claim a spot and have backups in the event the campground is completely booked.


Know of a no reservation, L.A. campsite that’s not listed? Share it in the comments below!

5 Comments on 6 Awesome Last Minute L.A. Campsites: No Reservation Required

8 Amsterdam Attractions That are Not the Rijksmuseum

When I began planning my trip to Amsterdam I dove into Pinterest like a mad woman. I wanted to check out everything is wonderful Dutch city had to offer: the…

When I began planning my trip to Amsterdam I dove into Pinterest like a mad woman.

I wanted to check out everything is wonderful Dutch city had to offer: the food, museums, the canals, the red light district, everything.

One thing I noticed that kept popping up was the Rijksmuseum. And while the Rijksmuseum is incredibly famous I knew I was looking for more than Amsterdam’s large, most visited museum.

I wanted something more manageable for my first trip – where I wouldn’t feel rushed. Bottom line, I didn’t want one attraction to fill up my entire day. This was a mistake I’ve made in the past and wasn’t willing to repeat it.

Though I adore museums, I figured I’d check out some of the lesser visited places and come back to the Rijksmuseum later if I still wanted to.

Boy, did I find enough to occupy my time!

There are thousands of places to go to in Amsterdam – places I wouldn’t have even thought to visit much less had the time if I had spent it all at the Rijksmuseum.

So check out below for my list of:


Amsterdam Attractions That are Not the Rijksmuseum


Attention: My post may contain affiliate links!


Museums:

rembrandt museum amsterdam

Rembrandt House Museum


Rembrandt museum amsterdam

Demonstration of Rembrandt’s Printing Press


rembrandt museum amsterdam

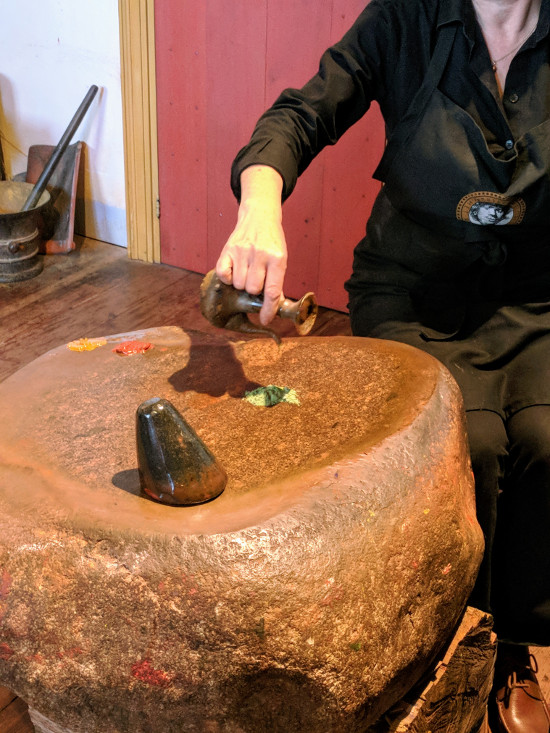
Demonstration of 17th Century Paint Making


Rembrandt House Museum

As a child my dad would take me to the museums in Washington, D.C. and we’d spend hours staring at remarkable works from the greatest masters. Rembrandt was, and still is, one of my dad’s favorite artists. So I grew to love Rembrandt’s rough sketches and self-portraits, remembering him as ‘the funny man’ who made faces in his drawings.

When I saw that his former home was made into a museum, I jumped at the chance to go.

The house itself is rather large by 1600s Amsterdam standards and hasn’t been changed much since Rembrandt lived and worked there.

The museum restored the house to its former glory giving us a look into the extravagant life Rembrandt led.

Unfortunately, in the 1650s the artist became bankrupt and moved, selling off a good deal of his rare collection of art & sketches, statues, animal bones and more, to pay for the debt he owed. Keep this in mind while wandering around.

Besides the artwork, most everything you see in the house is a replica of what would have been there. Pretty good looking replicas, I should say.

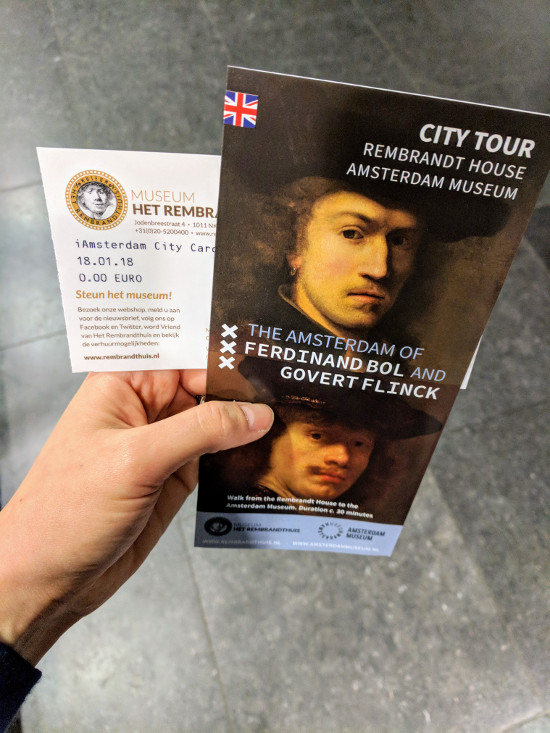
Normally a ticket would cost you €13 but if you purchase a IAmsterdam card ahead of time, which I highly recommend, entry is free.

The ticket includes an audio tour & access to all rooms, including demonstrations. Demonstrations happen daily are usually of Rembrandt’s printing press and how Rembrandt would have made his own paints. I recommend checking both out – they’re fascinating!

There’s a small gift show on the first floor and a free coat room (first come, first served). There’s no food or cafe in the museum so you might want to eat before or afterwards. The tour should only take about 1-2 hours depending on demonstration schedule.

All in all, I believe the Rembrandt House Museum is a great stop in Amsterdam! Certainly awesome for Rembrandt fans and those interested in seeing the inside of a 17th century Dutch home.

RelatedThe Most Important To-Do List Before Your International Flight

Van Gogh Museum Amsterdam

Van Gogh Museum


Van Gogh Museum Amsterdam

Selfie with Van Gogh Self Portrait


Van Gogh Museum

I don’t remember exactly how old I was when I first set my eyes on Van Gogh’s The Starry Night painting but I instantly fell in love with the short, thick painted brush strokes. To me, it seemed like Van Gogh added movement to his paintings – as if the wind would blow the tall, dark trees at any moment.

So when I saw my opportunity to check out the Van Gogh Museum, I immediately booked my tickets.

Pro-tip: Book these tickets in advance as they sell out quickly and the museum gets crowded.

The museum is set up in a way that you will want to begin on the first floor and work your way up. Each exhibit follows the life and career of the Dutch artist beginning from his childhood, to his death in 1890.

I learned so much more about Van Gogh than I thought possible here: what drove his work, his family life and how other artist’s work inspired his own. It was also amazing to see his extensive Japanese art collection which I never knew he was into.

While you’re wandering around each floor take note of how Van Gogh was ‘playing’ with different artistic forms. He seemed to gravitate towards a few post-impressionistic styles which really made his work stand out.

While wandering around, don’t forget to take a photo at the Selfie Walls which were scattered around the museum when I visited. Since you cannot take photos in most exhibition halls, these are great spots to get those much desired selfies.

Like I said earlier, you will want to get your tickets in advance. They’re €18 unless you have (drum roll please!) the IAmsterdam card and then it’s free. Just reserve your ticket time online and enter your IAmsterdam card number.

The museum also boasts a gift shop where you a pick up a souvenir and a small cafe. There’s also a coat-check on the bottom level but get there early since lines form.


Van Gogh Diamond Museum Amsterdam

Replica of Van Gogh’s Starry Night – This one has hundreds of diamonds embedded in the canvas!


Diamond Museum Amsterdam

Replicas of Royal Jewelry


Diamond Museum Amsterdam

Diamond Encrusted Skull – Worth Seeing!

Diamond Museum

I’m not always a girly-girl but when I am there’s usually glittering jewelry somewhere nearby. So a stop at the Diamond Museum was an absolute must.

Situated close to the Rijkmuseum and Van Gogh Museum, the museum is encased in a beautiful, three story, brick Dutch home just behind Coster Watches. Don’t forget to check out Coster Diamonds just a few doors down to see real diamonds on display. Always worth a look!

The Diamond Museum is every diamond lover’s fantasy.

The museum provides you with detailed information on the natural creation of diamonds, the diamond trade and how diamonds are used today. The museum doesn’t skimp on the the diamond trade history, they’ll show you the good, the bad and the ugly.

Another area of the museum that’s pretty enjoyable is the showcase of royal jewelry. It’s fun to image wearing such pieces – although I’d be terrified I would lose a diamond or I’d get robbed.

Please note that all of the pieces insides the museum are replicas of real items.

The museum is pretty small so it should only take about an hour to see everything. Make sure to either purchase your tickets ahead of time, they’re €10, or grab them for free with your IAmsterdam card (again, I highly recommend this!).

One more thing: don’t forget to check out the diamond encrusted skull near the end of the tour. It’s kind of over-the-top but still worth checking out.

Related: Long-Haul Flight Survival List


Non-Museum Attractions:

Canal tour amsterdam

Nighttime Canal Tour to See the Lights Festival


Canal Ride

You really cannot complete your trip without a ride through Amsterdam’s famous canals. It is quintessential to a full Amsterdam experience!

While there are tons of canal tour companies to go with the highly recommended ones are Lovers Canal Cruise and Blue Boat Canal Tours. I believe you can get a free ticket with both with your IAmsterdam card but restrictions may apply.

Most canal tours are 60-75 minutes but you can find some that are several hours and include food, drinks or entertainment.

Personally, I went for one of the smaller canal tours since I wanted to see more of the city, especially since I went during the Light Festival (January).

The Light Festival happens every winter where artists create giant light installations all around the city. You can view most of these from the canal so if you’re going in January, definitely book a night canal tour to catch these awesome displays!

Without an IAmsterdam Card, a canal trip can range anywhere from $20-$60+ USD.


artis zoo amsterdam

Inside the Bird & Mammal Hot House


artis zoo amsterdam

Unfortunately I don’t remember the type of bird this was but it was beautiful! They’d come right up to you!


artis zoo amsterdam

Sleeping Fennek fox – Didn’t want to disturb it


Artis Royal Zoo & Aquarium

In my humble opinion, the Artis Royal Zoo is worth every penny.

The zoo is quite large for being in the city and showcases a wide array of animals and beautifully maintained habitats.

Several of the smaller birds and mammals are free to roam around encased buildings which my husband and I gladly spent most of our time in. These buildings allow you to interact closely with smaller creatures and see how they interact with humans.

You’re not allowed to touch the animals but sometimes birds or the small mammals might climb onto your shoulders for a bit of rest.

The docents throughout the park are incredibly knowledgeable and will certainly tell you everything about the creatures in their care. Their love for the zoo and its inhabitants is like none other!

Before leaving the park, make sure to stop into the Aquarium. It’s much smaller than the Zoo but certainly worth a look.

Also stop in at the butterfly house where you’ll see dozens of colorful butterflies ranging in all shapes and sizes. It’s an incredible sight to see.

Tickets for adults (10y/o and older) are €21 and €17.50 for 3-9y/o children. Toddlers under 3 are free. If you order your tickets online you save €2. If you plan on visiting the Mircropia Museum as well, you will get a further discount for both Artis exhibits.

Related: Long-Haul Flight Survival List


micropia museum artis amsterdam

Alex checking out some micros through the microscope


micropia museum artis amsterdam

Me playing around with a gigantic version of a living microb


Micropia Museum

When we booked our Zoo tickets we also bought entry for the Micropia Museum. My husband was super excited about this one but I wasn’t sure how it’d turn out. I had in my head that we’d be looking at fungus in petri dishes.

That was pretty darn far from the truth. This place was amazing!

Upon entry we were greeted with interactive displays and a large microbe that actually looked pretty darn cute!

The museum takes you on a journey of micro-organism by the use of displays, videos, and real microscopic views of bacterias and tiny life.

The museum even has a working microbiology lab where you can watch scientists work and ask  them questions!

Don’t forget to check out the smells display on your way out of the museum – it’s a doozy!

This museum and the Zoo are must-see attractions if you’re traveling with a family. Youngsters will certainly get a kick out of these.

Tickets for adults (10y/o and older) are €15 and €13 for 3-9y/o children. If you order your tickets online you save €1.


sunday market amsterdam

Checking out a local Sunday Market outside the Rijksmuseum


sunday market amsterdam

Steaming cups of freshly pressed, hot apple cider


Sunday Market

Farmer’s markets and flea markets offer you a wonderful opportunity to brush shoulders with the locals. Grab a few refreshments and picnic on the grass!

These markets offer fresh fruits, veggies and handmade crafts, while local food trucks and cafes will set up areas to serve delicious dutch foods. Yum.

There markets move around the city so make sure to read up on them before heading out so you are guaranteed where they’ll be and when.

My husband and I were pleasantly surprised to stubble upon a large one in the open space between the Van Gogh Museum and Rijkmuseum on Sunday morning. I don’t know if it’s there every Sunday but it’s worth checking out if you’re in the area.

RelatedThe Most Important To-Do List Before Your International Flight


Haarlemmerdijk Street amsterdam shopping shops local

Haarlemmerdijk Street & It’s Shops!


amsterdam shopping shops local

One of my favorite stores in Amsterdam! This place was adorable and held a lot of fun, surprising gifts.


amsterdam shopping shops local

Seriously, how adorable! Just one of many surprises you’d find at It’s A Present!


Best vintage shop in the area – so many great finds and at really good prices too.


Shopping

This one is pretty general as there’s TONS of shopping all around the city but one street in particular stuck out.

Haarlemmerdijk Street blew me away with it’s collection of local shops. I didn’t seen one ‘brand’ store around so I knew I found a good locals-only area.

Lining the street were small boutiques, home good stores, bookshops, cafes, an old movie theatre and vintage shops. Oh, and enough restaurants for each night the month!

If you’re looking for authentic dutch finds this is the place to do it. Just know that the prices are little higher in these shops but what you pay out of pocket, you get back in high quality.

Besides, window shopping is free! 😉


Have you been to Amsterdam? Do you believe there’s a sight or attraction that should be added to this list?

Leave a comment below!


8 Comments on 8 Amsterdam Attractions That are Not the Rijksmuseum

The Ultimate Care Guide for Your Backpacking Gear

Backpacking gear isn’t cheap. You spend hundreds of dollars on gear that is meant to take a beating out in the backcountry. Not only that but this is stuff that’s…

Backpacking gear isn’t cheap.

You spend hundreds of dollars on gear that is meant to take a beating out in the backcountry. Not only that but this is stuff that’s meant to help you survive  in the wilderness so it’s got to perform. Right?

Surprise, surprise! That gear won’t last long if you don’t care for it after each trip and during the off season.

So the question now….how do you clean and store your backpacking items? 

If you do a general online search you will come up with hundreds of videos and thousands of websites. There are manufacturer instructions, organic/eco-friendly solutions, brand name chemicals and so on.

How do you get through all that info in order to find out what really works? That’s where this post comes in.

I’ve broken down the standard backpacker’s gear list to the most basic items: clothing, boots, sleeping bag, pad, water filter, bladders, tent and backpacking bag. I’ve done internet research, performed trials on my own gear and checked out backpacker forums, all so you don’t have to.

All this has led to creating the easiest, most comprehensive guide to cleaning and storing your backpacking gear.

So check it out below! 🙂 

The Ultimate Care Guide for Your Backpacking Gear


Attention: My post may contain Amazon affiliate links! As an Amazon Associate I earn from qualifying purchases.


camp camping clothing laundry gear

Clothing

Washing:

Clothing is a pretty important part of your gear. Clothing keeps you warm, helps cool you off, protects you from rain, sun, UV damage, the list goes on. So taking care of your backpacking clothing is crucial to making sure they last a while.

Whenever buying a new piece of backpacking (hiking & camping too!) clothing, make sure to always read the care instructions. This is the best place to look to see how much effort will be necessary to keep your garments performing as they’re supposed to.

Also be aware that some items cannot go into a dryer, particularly items that are made of 100% wool or have bug-repellent chemicals like permethrin woven into the material.

Those items, along with quick-drying or waterproof garments, will have to be hung to dry.

Personally, I spend a good chunk of money on my backpacking clothing so I usually wash my things in cold/warm water, with a non-scented, non-bleach detergent and then hang dry.

Storing:

You wash your clothing. You fold them. And then you put them away. Sounds pretty darn easy, right?

What about when you’re looking for that pair of hiking shorts or your favorite quick-drying shirt? Perhaps you picked up your spouse’s sock liners thinking they were yours?

Just like you would with your day-to-day clothing, your backpacking clothes need to be organized. Not only will it be easier to find what you’re looking for but when that last minute trip comes around, you’ll be able to pack faster!

I use large, clear storage containers with lids – very similar to these from Sterilite. I also use these to separate backpacking gear from camping, as well as for loaner gear when friends come on trips with us.

Related: The Ultimate List of Backpacking Luxuries


Algonquin 2018 Canoe Trip - Boots_Small

Boots

Washing:

“You’re telling me to wash my boots?” You might ask with some surprise. Yep! Wash those suckers but don’t do it by throwing them into the washer.

Instead grab a soft cloth, warm water and gentle soap and a non abrasive sponge. Oh, and a screwdriver.

Use the screwdriver to dislodge small pebbles that can become trapped in the treads. You can also use it to break up dried mud between treads.

Once your boot is clear of debris, use the water, soap and sponge to gentle clean the exterior of your boot.

If you need to clean the inside, take out the insoles (if you have them) and rub down the interior with a damp sponge and gentle soap. Repeat the process with a clean, damp sponge to get the soap out. Always air dry.

Since there is a wide array of boots, ranging from near-naked footies to Gortex covered mountaineering shoes, you might need to do some additional research or check the manufacturer’s website before washing.

If your boots need waterproofing, wash them first and then apply the solution while the leather is still damp. Follow REI’s directions for waterproofing.

You do not need to waterproof your boots if they are Gortex.

Storing:

When it comes to our shoes, we typically kick them off into a random corner of the room. But you should probably show some love to your backpacking shoes. After all, they’re an essential part of your backpacking gear!

Like your clothing you’ll want to have them organized. The best way to do this is keep like boots together: warm weather hiking boots, mountaineering boots, snow boots, water shoes, etc.

This will make it easier to find what you’re looking for.

You may also wish to keep them outside of a box so they’ll be able to ‘breathe’ which is necessary so the interiors do not develop mold. Also, do not stack them on top of each other – forceful pressure can disfigure your boots, making uncomfortable impressions and divots.  


North Face Tephora Sleeping Bag

Sleeping Bag  

Washing:

Let me tell you, whether you have a down, synthetic or blended sleeping bag, after a full backpacking season those things smell rank!

Of course, washing a sleeping bag can be stressful. Not only are sleeping bags expensive but they’re essential in keeping you warm and comfortable at night, allowing you to sleep better.

There are 3 big No-No’s when washing your bag:

  1. Do not use bleach or softeners as they can destroy the insulation material.
  2. Do not use a top load washer, or washer that’s too small.
  3. Do not dry cleaned unless it’s done by a sleeping bag professional.

Thankfully, Mike Jones of CampingGearFit.com has a wonderful, easy-to-use guide on how to wash and dry your down sleeping bag. Mike gives you all the ins and outs of what & what not to do, as well as who you can go to for professional cleaning.

While his guide focuses on down-filled bags, you can also use his guide for a synthetic bag too!

By taking care of your gear, your sleeping bag should last for years.

Storing:

There are two schools of thought for storing your sleeping bag during the off season:

  1. Hanging them (over a hanger or similar)
  2. Rolling them into a stuff sack

Personally, I don’t have room to hang my sleeping bags so I use the stuff sack they were purchased in or I buy a large, mesh laundry bag like this one.

If you use the stuff sack, do not compress it. Make sure your sleeping bag has room inside the stuff sack so that it can breathe.

Whichever your choose, you will want to store your clean bag somewhere it’ll not be squished, moist or scratched up. Also keep them away from UV light (like the sun) and heat, these both can easily destroy the bag.

Related: 10 Essentials For Hiking & Backpacking


Outdoor Gear Lab - Sleeping Pads

Sleeping Pad  

Washing:

While washing your sleeping bag sounds like a no-brainer, you’d be surprised that most backpackers also recommend washing your sleeping pad as well.

This was one thing I actually didn’t think about until I started writing down items for this blog post as it’s not an item I’d suspect would get dirty.

Pro-Tip: Don’t let chemicals like DEET and sunscreen get onto your sleeping pad. These chemicals will damage the synthetic materials very quickly

So on my latest trip I took a good look at my pad and, lo’ and behold, there was the beginnings of mold!

I nipped that one in the butt real fast.

I was thrilled to discover that gentle soap and water was all that’s needed. Just dip a soft cloth into soapy water, run down the whole of your sleeping pad and mop up with another dry, soft cloth. For tougher spots you can use an all purpose cleaner, just make sure it doesn’t have ammonia in it.

Let the pad fully air dry. Keep the valve open during the drying process and when storing.

Pro-Tip: Sleeping bag liners are a great way to extend the life of your sleeping bag. Liners help to keep body oils and dirt off your bag and can add an extra few degrees, making your bag even more cozy!

Storing:

The best way you can store your sleeping pad is by leaving it unraveled on a flat surface. This works best if you have a self-inflating pad.

But if you’re like me, you don’t live in a mansion so space is pretty hard to come by.

That leaves me with two ways to store my pad, either inside it’s stuff sack (more pads come with one) or hang it.

Some backpackers scoff at the idea of leaving their pads inside the stuff sack.

I actually believe it’s okay so long as you don’t fold your pad the same way after each use. Folding the pad the same way each time can cause the material to weaken at those creases.

If using the stuff sacks worries you, install a hook or peg to a wall to hang the pad. Those with form or self-inflating pads might have issues with this so they don’t drape easily. If you have an air-filled pad, just leave the valve open and drape over a hanger.

Pro-Tip: The material for your pad is thin and can be easily punctured. To prevent this, never place your sleeping pad directly on the ground. Always have something underneath like a tarp or blanket. Also, never carry your pad on the outside of your backpack.


Cottonwood Lakes 2018 Backpacking - Filtering Water

Water Filter

Washing:

Unfortunately cleaning your water filter is a little more involved than just letting it dry – although I usually only clean it once a year and just let it air-dry after each trip.

Check the manufacturer’s instructions but for most water filters, cleaning the filter or cartridge with a few cups of water and a tablespoon of bleach should work fine.

If your filter works sluggishly or you notice build-up, you can use a baby toothbrush to gently remove particles. If you have the Katadyn Hiker water filter, you will need to remove the plastic ‘cage’ and protective film in order to clean the cartridge but it’s easy.

When finished, leave everything out separately to fully dry.

Storing:

Storing your water filter is easier than you think. If you’ve taken the filter apart to let it fully dry, reassemble it and store.

To store, all you need is one gallon size ziploc bag and two smaller ziploc bags. Label the smaller bags with ‘clean’, the other ‘dirty’, and place the corresponding hoses into each bag.

You never want the hoses to touch since that can cause cross contamination and allow for viruses to get into your drinking water.

Put the smaller bags into the gallon size ziploc along with your filter and you’re done. Easy-peasy, lemon-squeezy!

Related:The Ultimate List of Backpacking Luxuries


10 Essentials Backpacking Gear - Bladder

Bladder

Washing:

You’d think water bladders wouldn’t get dirty because they hold, well, water. Water creates moisture and moisture breeds mold which will not only make your water taste horrible but can also make you sick.

Getting sick in the backcountry is a big No-No!

If you find film or dark spots on your bladder or hose, you will need to run diluted bleach through both to get rid of the mold. The best way to do this is with hot water and a tablespoon or two of bleach.

Pour the hot (not scalding) bleach water into your bladder, close it up. Hold the bladder above you so that the tube and bite valve hand down. Squeezing the bite valve will release the bleach water through the tube. You may need to do this multiple times depending on how dirty the bladder and tube are.

Once you’re satisfied, run clean, cold water through the bladder and tube so no bleach taste lingers.

For general cleanings, a little dish soap is all that’s needed. You can see how it’s done in this very helpful CamelBak video.

Pro-Tip: Dry your bladder upside-down so that water doesn’t pool at the bottom.

Storing:

Before storing, check the creases of your bladder to make sure it’s fully dried – a wet/damp water bladder can hide mold. Do not store with the lids tightened.

Keep your bladders in an area that’s not cool and dry.

Some people store theirs in the freezer but I usually keep mine in our garage (we live in a moderate, dry climate) or in a kitchen cabinet.

Store the water tubes separately or packed inside the bladder.


Algonquin 2018 Canoe Trip - Tent

Tent

Washing:

Tents are pretty tough and can handle normal wear and tear but after a while will need some cleaning. This is especially true if your trips typically involve rain or snow; mold and mildew becomes an issue.

For general care, you can get away with shaking out the rainfly and tent. Spot clean where necessary.

If your tent becomes muddy or takes on just a little mold, a gentle, non-fragrant soap and sponge will work.

If mold has become a problem, or the tent begins to smell, you will need to use a solution like Nikwax Tech Wash or Granger’s Outdoor Cleaner. Just be sure to use according to instructions.

Never put your tent through the washer machine!

Storing:

Most people store their tents in the tent bag or sack it came in. For the most part, that’s okay!

However, if you live in an area that experiences humidity, you might want to forego that.

Opt instead for a pillow case and loosely store the tent parts inside, separated. This will allow air flow to seep in and help avoid moisture which can cause mildew and mold.

If you live in a drier area, like I do, the tent bag or sack is fine. Just be sure to have items loose inside.

Pro-Tip: Don’t aggressively stuff your tent back into the sack as it can lead to ripping and tears. Instead, squeeze air out of your rainfly and soft tent as much as possible before placing it in the sack. It will expand afterwards and that’s perfectly okay.

Related: 10 Essentials For Hiking & Backpacking


Photo by Simon Migaj on Unsplash

Backpack

Washing:

You carry it on your sweaty back, it carries everything and it’s basically what protects all the necessities you need to survive outdoors. Your pack.

Eventually, your pack will get dirty and worn, whether that’s over time or because you set it down in mud. On accident, of course!

If you do by chance set it down in mud, or it just gets dirty in general, cleaning it is pretty easy. Your trusted gentle non-fragrant soap and sponge will easily take care of mud, dirt and abrasions.

If your bag of trail mix melts inside your pack and now you have chocolate smeared across the bottom, again, the sponge is your best friend. Just remember not to use soap inside and gently clean the interior with just water.

Storing:

If you have the room for it, you should store your bag vertically on a wall. This ensures your bag’s internal frame doesn’t become disfigured.

To do this, you will need either a hook, like these metal cup hooks, or several large command hooks.

The metal hooks are certainly more permanent (and stronger) but if you’re in a rental or apartment, the command hooks work well – they’ve held my 56 liter Gregory bag for a full two years without loosening.

If you use the metal hooks, make sure to find the stud first before you drill into the wall. The wall will need to be able to hold approximately 10 lbs so finding the stud helps.

I also love hanging mine so they look organized and stay clean.

If you don’t have the space to hang them, you will need to lay them flat, without heavy items on top. If you have more than one bag you can certainly stack them – just make sure they’re flat so the frames don’t bend.


And there you have it! Doesn’t sounds so hard, does it? 🙂

If you have any suggestions or comments on how you keep your gear clean and organized, feel free to leave a comment down below!


No Comments on The Ultimate Care Guide for Your Backpacking Gear

How to Ease Stress and Anxiety While Traveling

It always begins with fear, distress and dizziness. Then there’s the feeling you’re surrounded by too much noise or too many people. Shortness of breath follows afterwards and suddenly your…

It always begins with fear, distress and dizziness. Then there’s the feeling you’re surrounded by too much noise or too many people. Shortness of breath follows afterwards and suddenly your chest tightens. You squeeze your eyes, willing your breath to return to normal.

You’re in the midst of a panic attack.

Approximately 40 millions adults in the US have some form of anxiety, whether it’s general, social or set off by specific triggers.

Unfortunately, according to Anxiety and Depression Association of America, only 36.9% of suffers receive any form of treatment.

Traveling can be pretty stressful and it can become a nightmare if you have anxiety. You might not know where to go, how to communicate with people or how to get around in a new city – all of these things and more can induce some form of an anxiety attack.

I have anxiety, and panic attacks can become common while I’m traveling. I’ve even had them on the way to the airport!

I tell you this so that you will understand that the suggestions I give you below come from experience and should not be used as an alternative to proper medical care for mental health issues.

That being said, here are my suggestions for:

How to Handle Stress and Anxiety While Traveling


Attention: My post may contain Amazon affiliate links! As an Amazon Associate I earn from qualifying purchases.


Communicate with Your Travel Partner

helping anxiety stress

Let Them Know You Are Anxious

If you can feel the anxiety coming on let your travel partner know. Communication is your most powerful tool when it comes to anxiety. If caught early, you and your travel partner can work on making the situation easier.

Ask Them to Provide Assistance If Necessary

While they might not fully understand what’s going on, direct your travel partner as to what you need in order to feel safe and calm. That can be something like a quiet space, helping you with breathing exercise, giving reassurance or just providing small-talk & jokes as a distraction.

I find laughter to be an amazing anxiety and stress reliever. I’m very lucky my husband and travel partner is really good at it.

Understand Your Triggers

After you’ve had an episode or panic attack, try to assess what set it off – keep a running list if necessary. By understanding and knowing your triggers you can try to lessen the impact they have on you.

Triggers can include:

  • Hunger
  • Fatigue
  • Overstimulation
  • Large crowds

Once you know these what your triggers are, share this information with people you feel comfortable with. This way, they can take precautions to make travel easier.

Trust Your Travel Partner Has Your Back

People tend to travel with a companion, usually a friend or family member, so having support is always there.

This can be difficult if you’re traveling solo or with someone you don’t have a close relationship with, like a school group or a coworker. If that’s the case, try breathing exercises and calming meditation to help ease yourself back into a calm state. 

It’s also best to let your group leader know you have anxiety. Don’t feel like you have to be secretive about it – anxiety is common and your guide may have been trained to help you.


Plan Ahead and Be Prepared

prepare calm anxious

Make Sure to Cover All Your Bases

Being overly prepared is much better than being under-prepared. Perhaps it’s my years of camping & backpacking that has taught me this but having your bases covered always makes me feel more confident about my trip.

If you’ve read my post about preparing for your flight, you’d see that there are several things you can do to be prepared including double checking your itinerary, purchasing medical and trip insurance taken and providing someone close with your trip details.

Related: The Most Important To-Do List Before Your Flight

Keep Detailed Records and Print Out Tickets

Some people will become panicked if they cannot find their ticket. By keeping both physical and digital copies of tickets, itineraries and visas, you can diminish the likelihood of something like this happening.

I love using TripCase and Google Drive to handle things like tickets and my itinerary. They’re both easy to use and you can download everything so it’s easier to access if you don’t have WiFi.

Allocate Plenty of Time for Transportation

Give yourself enough time to get to the airport and choose a flight that allocates a decent amount of layover time so you can easily catch your next flight.

Stressing out because there’s traffic on the road or massive security lines will not help to ease you away from anxiety. You cannot control what happens around you but giving yourself ample time will certainly help you with how you react to those stressors.

Also, if you miss your flight due to delays or weather, most airlines will either reimburse you or move you to another flight.

Turbulence Can Agitate Anxiety

I get hit hard with this one as I’m a nervous flyer and become anxious at any bit of bumpy movement. I’m usually that person looking around the cabin with wide eyes, gauging everyone else’s reaction.

Normally I’m met with weird looks which, although doesn’t help me feel 100% better, does remind me that turbulence is a normal part of flying.

And flying still remains the safest form of transportation.

When turbulence does occur, I usually turn to my partner for some reassurance and idle chit-chat until the bumping has passed. For me, this always works.

Bring a Comforting Item or Two With You

Whenever I travel to somewhere new I like to bring something comforting with me. Sometimes that’s a warm scarf that smells like home or my favorite perfume.

Find something that you love, something that evokes happy or calming memories, and bring that with you. Just remember to keep it small so it’s easier to carry.

Whenever you feel anxious or stressed out, pull out that item and know that you’re safe.


Make Sure to Take Care Of Yourself

girl meditation

Get Plenty of Sleep the Night Before

Though it might be difficult, getting 8 hours of restful sleep the night before your trip can really help with anxiety. According to Anxiety.Org,  Sleeps allows your body to recharge, heal and relax – all of these help with reducing stress and anxiety.

When Alex and I traveled to Morocco (my first international trip), I didn’t sleep the night before or during our flights. Basically, I went 30+ hours without sleep!!!

That made me irritable and every little thing caused me distress. I ended up having half a dozen panic attacks in just a span of days. Not my idea of fun.

Try gentle yoga, reading or drinking a calming tea. Talk with your doctor before taking any sleep aids.

Eat a Nutritious (Not Heavy) Meal

Eating a light, healthy meal not only helps to keep hunger pains away but also provides your body with the fuel it needs for travel. And if you’ve ever been hangry before, you know that it can lead to confusion, irritability and fatigue.

This is why having small snacks or a light meal can set you on the right path for travel.

I like to eat a protein rich meal, like scrambled eggs, before heading to the airport and then refuel with snacks like apples, salted cashews, trail bars and gummies.

Related: Long-Haul Survival List

Splurge on a Treat

You’re heading out on vacation, why not grab a little extra treat to make the flight more enjoyable? Perhaps it’s your favorite gummies, or a new movie downloaded to your tablet or even a gossip magazine!

Chocolate is my go-to treat for a long flight. I don’t just get any normal chocolate, I splurge on the higher quality stuff and make sure to savor every bite.

If you’re a choco-holic like me, grab some delicious dark chocolate which contains antioxidants and is better for you than milk chocolate.

Of course, whatever your treat may be, moderation is key.


Staying Hydrated is Extremely Important

glass water dehydration

Planes are Notorious for Being Dry

Ever get up in the air and noticed that your lips are chapped or your hands are dry? Planes are notorious for having dry air. This is because the air is recirculated throughout the cabin – basically, there’s no fresh air. Ew!

This means you will need to drink more water than normal while flying. Keeping hydrated is extremely important to your body and mental health. When you become dehydrated you being to feel dizzy or faint which can trigger a panic attack.

Avoid Caffeine and Alcohol if Possible

During flights, particularly long-haul or international flights, coffee and wine are free…and in abundance. While it might be tempting to have one or the other with a meal, those who suffer from anxiety are better off without.

Not only will both dehydrate you, they’ll also increase your heart rate which can lead to increased anxiety.

Too Late, Here’s A Panic Attacks

If you’re in the throws of a panic attack, and you cannot calm down, it may better to let the episode run its course. Most panic attack only last a few minutes and subside quickly – although it leaves you shaky.

By fighting the attack you might be delaying your body’s ability to calm yourself down.


Try Calming Yoga & Meditation

girl meditating calm

Middle Seat Yoga

You’ve heard that yoga is a pretty good workout but it’s also really calming and restorative for your mind & spirit. Gentle yoga helps your body to release stress and tension which reducing the heart rate and increasing good chemicals in the brain like endorphins.

If you’re on a plane, doing yoga might be a little difficult but not impossible.

Try twisting your torso to the left and right, holding for a few breaths and then slowly releasing. You can also bend your head forward, gently placing your hands behind your head to increase the stretch. Breathe through your mouth, not your nose.

Be sure to not stretch too far so you don’t injure your neck – you want a gentle, relaxing stretch.

Another great stretch is to stand in the aisle (perhaps while waiting for your seatmate to come back from the lavatory?) and bend forward, allowing your head, neck and arms to be loose. Try reaching for your toes, if you can, but otherwise, hang loosely.

Do this a for a few breaths and slowly roll back up, one vertebrae at a time so you do not become dizzy.

Meditation and Breathing Exercises

Breathing is essential for humans, we all know that, but learning to control your breath may help save you from a panic attack. At least it will help to calm your nerves and slow your heart rate.

What I try to do is visualize a balloon inside my belly. I inhale slowly for 8 seasons, letting the balloon of my belly grow larger, hold it for 3, and then release it for 8 seconds so it deflates.

Meditation is also a great way to relieve anxiety but it does involve some practice. While there are plenty of meditation methods, no one way is right for each individual so try whichever methods work best for you!

One method I like uses imagery. Begin by closing your eyes and imaging a safe, peaceful place: perhaps a beach with calming waves or a sunny meadow. Try tuning out everything around you. If you’re having a hard time, find a more quiet spot and repeat the process again.

In your safe place, imagine your are floating or at complete peace. When you feel comfortable, open your eyes and hold onto that feeling.


you got this


I hope these suggestions will help you the next time your anxious or stressed. I do my best to explain anxiety but the experience isn’t the same for everyone and it’s definitely frustrating to explain to someone who doesn’t have anxiety.

Though I have anxiety, I don’t let it control my life or my travels. I don’t let it set me back because I know I can control it with practice and help.

Just remember that your anxieties and feelings are valid, even if no one else understands. You’re strong and you will get through it.

Have a suggestion on how to handle travel anxiety? Leave a comment below!


11 Comments on How to Ease Stress and Anxiety While Traveling

Easy Dehydrated Strawberry Chips

It is late spring and that means southern California is inundated with millions of glorious little red gems – the strawberry! I mean this in the literal sense as you…

It is late spring and that means southern California is inundated with millions of glorious little red gems – the strawberry! I mean this in the literal sense as you can pick up pound of these ruby beauties for about 75¢ a pound.

That being said, my house always has strawberries. Whether it’s fresh, dried, canned or frozen, they are within reach.

Besides being eye catching, the strawberry is also considered a superfruit. They are jam-packed with vitamin C, potassium, fiber and antioxidants which means they’re good for your heart and overall health.

strawberry red fruit superfruit


They apparently help with cancer prevention as well! So strawberries being labeled as a superfruit no longer surprised me. 🙂

When the fruit is dehydrated, or dried, you still retain many of these nutrients which makes them terrific snacks for backpacking, camping or just daily running around.


Attention: My post may contain Amazon affiliate links! As an Amazon Associate I earn from qualifying purchases.


So when a good friend asked how to dehydrate strawberries, I jumped at the chance to explain how easy it was and what delicious results drying would yield.

Her question was also perfectly timed as we were preparing to head out for a 2 day backpacking trip to Cottonwood Lakes in the south eastern Sierra mountains.

What better way to enjoy spring than with sunshine, majestic mountains and sweetly tart, dried strawberry chips!

So let me show you how easy it is to create… 


Dehydrated Strawberry Chips

pinterest dehydrated strawberry pin

Ingredients/Tools:

Instructions:

You will want to look for strawberries that are fresh but not overly ripened since you’ll need them to be firm. Firmer strawberries will be easier to cut but you can still get away with this using ripened strawberries.

strawberries book dehydrate

Related: Easy Dehydrated Pineapple


Fully wash the strawberries and let them sit for an hour to dry. If you are crunched for time, pat them down with a paper towel.

Once the strawberries are dry you can begin cutting them into ¼ or ⅛ thick slices. There’s two different cuts you can make, neither are wrong.

slice horizontal strawberries red


Horizontally will give you round chips, vertically will give you pretty strawberry shaped ones. I thought vertical cuts were faster but it’s up to personal preference.

vertical strawberry slice


Once finished, spread the strawberry slices out on your mesh sheets and place into dehydrator.

strawberries slices red fruit


Pro-tip: Wash out your dehydrator if a cat has previously used it as a napping spot.

cat dehydrator


Set your temperature at 135°F/57°C, dry for approximately 10-18 hours depending on you humidity level. Higher humidity requires longer drying time.

dried dehydrator strawberries slice


Store in airtight container, keeps for 1-2 months.

dried strawberries dehydrator


The final product should be these beautiful strawberry chips which you can use in granola, oatmeal or by themselves. Yum!

Related: Easy Dehydrated Pineapple


Bonus Tips!

  • Don’t use a wooden cutting board if you can help it. I’m still trying to get strawberry juice stains out of the wood. Plastic is better.
  • If you find that some of your strawberries have mushy spots, either cut around them or reserve those for jam or smoothies.
  • Add a splash of lemon juice for extra zing!

What do you like to add dried strawberry slices into? Leave your thoughts or ideas down below in the comments. 🙂


1 Comment on Easy Dehydrated Strawberry Chips

Type on the field below and hit Enter/Return to search

Get the Latest from Thousand Mile Boots!
Receive all the latest outdoor and travel tips & advice.
We will always respect your privacy.